Thursday, April 25, 2024

Seize the Birthday #282


Hello my dear Crafty Friends!  I'm back today with a card made especially for our latest Seize the Birthday challenge.  The Topping this go 'round is Off the Edge, a prompt that could have several meanings.


I chose to interpret the Topping as an element that 
continues off the edge of the card panel although a snarky card 
about "pushing one over the edge" did enter my mind.


The cute squirrel, nuts and sentiment were stamped onto a white panel.  The images were colored with Copic markers.  The edges of the panel were blended out with ink.  The panel was matted with a narrow border of black cardstock and then positioned on the kraft card base as if the die cut hands were holding a sign.  I think this one turned out very cute and can't wait to play some more with this fabulous sign die set.  So many possibilities!

Supplies:
MFT - Sign of the Times die
MFT - Squirrel! stamp

I invite you all to play along with us at Seize the Birthday!  The Topping is optional but it must be a birthday themed card.  Thanks so much for stopping by.  Your time is greatly appreciate.

Jules

Thursday, April 18, 2024

Spellbinders - My Favorite Person


Today I'm featuring more Spellbinders products.  These happen to be included when you purchase the Better Press system which I recently purchased for myself.  I've been really pleased with the supply options and amazingly crisp results.


Anticipating my Copic coloring, I pressed the floral plate into white cardstock using a dye ink from my stash. After coloring I added the score lines manually and then used an edge die to create a fun border.  I adhered it to a blue card base and added in some clear droplets.  I think this image would make for a beautiful sympathy card when switching out the sentiment.

Supplies:
Spellbinders - Better Press floral plate (included with machine)
Spellbinders - Small Die of the Month Club Feb 2018

If you're on the fence (like I was) I wholeheartedly recommend this new plate system.  I know I'm going to have lots of fun with this in the future.

Thanks so much for your time!!!  Much appreciated.

Jules

Wednesday, April 17, 2024

Spellbinders - Sympathy Cards


Hello again.  Last week was a busy one.  Today I'm featuring another gift from Spellbinders however it isn't from this latest release. I've been seeing these large monograms all over IG so I'm thrilled to be part of the "in" crowd.  Sympathy cards are so hard to make so I'm grateful to be able to add this one to my collection.


The extra large monogram and sentiment are Better Press plates.  I really love this system, especially for sentiments.  The results are just so crisp.  The top card was "stamped" with black pigment ink and colored in with Polychromos.  I added a strip of my favorite embossing folder and a border of black and white striped designer paper.  Card #2 was an experiment with kraft cardstock and white pigment ink.  It's certainly okay but I need to tweak this method a bit.  I trimmed it out in pink cardstock and some gold metallic spray to finish it off.

Supplies:
Spellbinders - Floral W Better Press plate
Spellbinders - Leafy Helix embossing folder
MFT Stamps - b/w striped 6x6 paper pad

Thanks so much for visiting my little corner of the blogosphere!!  Your time is much appreciated.

Jules

Tuesday, April 16, 2024

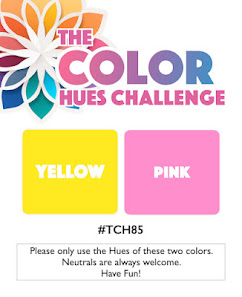
Color Hues #85


Happy Middle of the Month!!!  It's time for another round at Color Hues where we challenge you to create a card using only the two chosen hues along with neutrals.  Today's new color duo is Pink and Yellow, brought to us by Hannelie.


If someone says Pink, I say Flamingo!


Today's card features a mix of Spellbinder supplies.  The flamingo and pot were cut from pink cardstock and edged with ink.  The background panel was embossed, trimmed with a scallop die and adhered to a larger pink panel.  The sentiment is part of a glimmer set.  The dots on the pot are actually negative pieces from the scallop die.  The florals and border were embellished with gems.  The greeting continues on the inside of the card.

Supplies:
Spellbinders - Plant it Here dies
Spellbinders - SDOTM Feb 2018 (lace)
Spellbinders - Lavendar dies
Spellbinders - Envelope of Wonder dies
Spellbinders - foiled sentiment (not sure of the name)

Thanks so much for stopping by!  I invite you to visit our blog for more colorful inspiration and hope to see your card in our gallery.  

Jules


Friday, April 12, 2024

Rubberstamps.com - You're a Keeper

 
I'm back with my final card from Rubberstamps.com for this month.  It features another fun bear set named You're a Keeper.  

(This is my second card for today so please feel free 
to browse around.  This has been a busy release week for me.)


I stamped, cut and colored my elements with Copic markers.  I knew I wanted a black background but was undecided about how to add the cute sentiment.  I thought this designer paper had some bee hive vibes so I used a notched border die to jazz it up a bit.  I realized after I stamped the sentiment that I'd forgotten the A from the set so I die cut the letter from white cardstock and colored it with my blue Copic.  I added some white lines for details and called this one done.

Rubberstamps.com - You're a Keeper stamp set
Altenew - Notebook Border die

I invite you to visit the Rubberstamps.com website for a look-see at all of the cute stamping products they have available.  Thanks so much for visiting!  Your time is much appreciated.

Jules


Spellbinders Propagation Garden --- Just a Note and Hugs


I'm back today with two more cards from the new Propagation Garden Collection by Annie Williams and Spellbinders.  Both cards combine both new release products with older ones from my stash.  First we'll start with this "just because" card.   


The leaves and embossing folder are part of the new release.  
The remaining products are all past releases from Spellbinders.


To create my card ...

I pressed Versamark ink onto the leaf plates and followed it with white embossing powder.  The sentiment is also a heat embossed image.  I used two dies from last fall's Notched Corner set to create the focal point grounding image.  I embossed the smaller one and opted to use the debossed side this time around.  I do believe this is going to be one of my "go-to" texture folders.  I absolutely love it!  I dug through my Spellbinders stash and found these florals dies from an older kit of the month.  The butterflies are also Spellbinders but I didn't record the name of the set.  (I think they came with a tree die????)

I'm pretty happy with the end result and love that I can combine so many older sets with new ones to get a very cohesive look.  

Supplies:
Spellbinders - Essential Sentiments stamp set (out of stock)
Spellbinders - Small Die of the Month club June 2020
Spellbinders - butterflies (set unknown)


My next card is a bit over the top but I'm rather digging it.  I used gold embossing powder on the Tropical Leaves set along with other gold elements to create a very special "hugs" card.


After die cutting all of my elements I clustered them in the top left corner trailing down along the embossed background.  I was thrilled that I actually captured some of the shine in my photograph.

Supplies:
Spellbinders - florals and leaves (unknown)


Thanks so much for visiting!!!  I hope you take an opportunity to check out the new products from the Spellbinders team and I will be back soon with more card examples from this wonderful company.

Jules

Thursday, April 11, 2024

Seize the Birthday #281


Hello Crafty Friends!  The Seize the Birthday gang is back with a new Topping.  Our fearless leader Nancy is the hostess and she's asking us to combine any color with green on our birthday cards.  

(This is my second post of the day so if you missed the first one
I'd appreciate you having a look see around my blog.  Thanks!)


I chose the combination of Orange and Green.


I began my design with block lettering and a cute mouse die cut that I inserted in place of the A in Happy.  I used an embossing folder for the background, placed a festive balloon in his hand, heat embossed the sub sentiment and added a few tiny gold stars as embellishments.  Overall, it's a fairly simple design.

Supplies:
MFT Little Uppercase dies
Cottage Cutz - Forest Critters
Simon Says Stamp - Happy
Stampin' Up - Painted Texture embossing folder

I invite you to visit our blog for more inspiration.  Whether you play with the Topping or not we would love to see your birthday creations in our gallery!  

Thanks so much for spending a bit of your time with me.

Jules


Spellbinders Propagation Garden --- Sympathy Card and a Birthday Tag


Hello Crafty Friends!  I am back with more new products from the Propagation Garden release designed by Annie Williams. Today's examples use a new set of Better Press plates named Tropical Leaves.  As you will see later this week, I created several cards using different color variations of this set but for today's card I kept it very simple and traditional.


I thought these leaves looked fabulous in black and white so I am using them "naked".  I combined a few of the leaves with a "new to me" stamp set and a really, really, really old artsy fartsy frame (as in more than 15 years old), both from Spellbinders.  I think simplicity is best when it comes to sympathy cards so I left this one un-embellished.  (Did I just make up a new word?)  

In my next example I used the same Better Press plates to create gold embossed tags.  All you need to do is swap out the black ink for Versamark and then use your favorite gold embossing powder.  I stamped the sentiment vertically (from the same stamp set as above) and created a wonderful birthday tag.


Supplies:
Spellbinders - Essential Sentiment clear stamp set (out of stock)

I hope you'll visit their website to see all of the wonderful new products they have in store for us.  Thanks so much for spending a bit of your day with me.  I'll be back later this week with more examples.

Jules


Wednesday, April 10, 2024

Rubberstamps.com - More Bee A Honey Bear stamp set


I have two additional cards created from the Bee A Honey Bee stamp set that I featured yesterday.  I'm really excited to be part of this team and hope you garner a bit of inspiration from my examples. 


Card #1 uses only the florals from the set.  (And what fun florals they are!!!)  After stamping and cutting with my Brother Scan and Cut I did some very messy Copic coloring of the florals and leaves.  I really love this simple whimsical look.  I arranged the florals in a circle to create a wreath and adhered it to an embossed white panel.  I added a narrow border and popped the whole thing up on an A2 white card base.  I thought the addition of a black and white die cut sentiment was perfect for this design.

Supplies:
Rubberstamps.com - Bee A Honey Bear stamp set
Simon Says Stamp - Script Thanks and shadow die set
Simon Says Stamp - Blossom Field embossing folder
Honeybee Stamps - tiny white gems


My second card was inspired by a Winnie the Pooh DVD that my daughter watched on repeat as a toddler.  In it Pooh disguises himself as a bee to fool the hive into thinking he's one of them.  Think it worked?  LOL!


I colored this cute bear in Winnie the Pooh shades of yellow and orange.  The sentiment is from an older set by Ellen Hutson.  I adhered the finished panel to a scalloped card base before adding it to the brown card base.  I added in some of my favorite tiny gold stars as a finishing touch.


Rubberstamps.com - Bee A Honey Bear
Rubberstamps.com - Bee A Honey Bear svg cut file
Ellen Hutson - Totally Random Sayings stamp set
WPlus9 - Sunshine Layers die set
Honeybee Stamps - tiny gold stars

I have one more card to share with you.  It's been a busy week and I appreciate your support.

Thanks for visiting!

Jules


Spellbinders Propagation Garden --- Love Card


Hello dearest Crafty Friends!  Who doesn't love Happy Mail?  I know I sure do and am always delighted when Spellbinders shares some of their new releases with me.  Today I'm featuring a really innovative die set from their Propagation Garden release.  


My featured die today is called Propagation Garden Frames and I absolutely love it.  It's part of a whole larger collection designed by Annie Williams which includes beakers, vases, florals and sentiments.  Because I received only the "swinging" propagation station set from this release I had to be extra creative when designing my card.  

I began by die cutting my propagation station elements out of wood grained cardstock which I "grunged up" with some dye ink.  My beakers were made using an old Spellbinders holiday ornament die.  I snipped off the top of the ornament and added a hand cut neck to create flasks.  I colored in the liquid with an alcohol marker, stamped some bubbles and added the finished flask to a larger circle of vellum.  The stamped sentiment is from an older Spellbinders set which I believe is no longer available.  (I was a research lab rat in my younger days so chemistry sets always have a special place in my heart.) 

I'm pretty proud of my ingenuity if I can say so myself.  :-)

I strongly urge you to visit their site and see all of the wonderful new sets that coordinate with this really cool die.  I know I'll be purchasing at least two accompanying sets.

Supplies:
Spellbinders - holiday ornament die from old Spellbinders Christmas Card Kit
Spellbinders - Reaction stamp set (no longer available)
Avery Elle - Hello Chum stamp set (bubbles)

Thanks so much to Spellbinders!  And thank so much to you as well for spending a bit of your day with me.  I have more new Spellbinders products to share with you so I do hope you'll come back and visit later this week.  

PS - I have two posts today so feel free to meander around my blog.

Jules

Tuesday, April 9, 2024

A Little Secret from Me and Rubberstamps.com


I've been keeping a little secret.  I was contacted a few months back and asked if I'd like to be a member of a new design team being started by Rubberstamps.com.  Let's just say they didn't have to twist my arm.  *wink*  


Today I'm delighted to share two cards with you that I created using the Bee A Honey Bear stamp set.  I added some of my personal products on these cards however all of the stamped images (sans the tiny bit of grass) are from the featured set.


I used my Brother Scan and Cut to cut out the stamped images however they do offer a free cut file in lieu of dies. I think this is a fabulous option.

You may notice that I took a bit of artistic liberty with Mr. Honey Bear.  Because I'm not a coloring expert I found him easier to color by drawing a line to separate out his tummy.  Depending on your coloring skills you may want to try this as well.

All of my images were colored with Copic alcohol markers.  I added the images to debossed/embossed panels.  I kept my first card very simple.  My second design has some added elements in the notebook edge, tiny stars and heat embossed sentiment.  

I think these will make wonderful encouragment cards for humans of all ages.  

Supplies:
Rubberstamps.com - Bee A Honey Bear stamp set
Colorado Craft Company - Greener Grass stamp set
We R Memories - old floral embossing folder
Altenew - Checkered Squares embossing folder
old, old, old EK Success notebook edge punch
Honeybee Stamps - tiny gold stars

We have an Instagram hop happening this week to introduce you to all of the new team members and their work.  I hope you'll join us there.  I do have additional cards to share later this week.  

Thanks so much for visiting my little corner of the blogosphere.  Your time is always appreciated!

Jules

Saturday, April 6, 2024

Sisterhood of Snarky Stampers #249


Hello my Snarky Friends!  The Sisterhood is back this month with another fun prompt.  In April we are looking for cards with a bit of a twist on their fold designs.  I will admit I spent far more time on this than warranted but I'm just not a fancy fold kinda person.


For that reason I ended up using the traditional gatefold design.


I almost said the other F word.  LOL!


The inside...

I scored a half sheet of navy cardstock at 2.25" from each side and creased them to get two folds that meet in the middle.  I used a postage die set to cut a panel from both white cardstock as well as designer paper, cutting each in the center so as to fit on both sides of the opening. (The right side mirrors the left sans the diamond die cut) I die cut large decreasing sized diamonds from navy, white and red cardstocks which I layered and adhered to the left side of the card base and then adhered a white sailboat die cut to the center.  I used the same postage die to cut an interior panel and stamped my sentiment near the top.  It should not have taken me an entire day to create this and boy am I ever happy that this challenge is behind me.  That said, I have an awesome masculine card for my stash.  Living in a beach town, this one will definitely come in handy.

Supplies:
Altenew - Fine Frames die
Simply Graphic - designer paper
Ellen Hutson - Stay Salty stamp set
Mama Elephant - Peek a Frame die set
sailboat die - unknown

I hope you'll visit our blog for more fancy inspiration.  I am looking forward to seeing your ideas as I apparently have none of my own.  *sigh*  (Help a girl out for next time, would ya?)

Thanks so much for visiting my little corner of the blogosphere.  Your time and comments are greatly appreciated.

Jules

Monday, April 1, 2024

Color Hues #84


It's the first of the month once again which can only mean that the Color Hues team has a new challenge in store for you.  Cindy is our hostess and she has chosen the duo of Peach and Green.   


Don't be alarmed at the bright colors in the graphic.  Remember, this is a HUES challenge so pick your favorites and play along.


I did something a bit different for me and used designer papers as the base for my dies.  I should do this more often as I really love the unique look it can bring.  I used a 6x6 paper pack to ensure that all of the colors and patterns coordinated nicely but because it's a thinner material I backed them all with a layer of heavy weight white cardstock.  I ink blended a Distress Oxide color onto one side of the die cut panel before adhering my elements, some of which were popped up for dimension.  The sentiment was stamped in a crisp black pigment ink.  I added a sprinkle of coordinating colors of pearls as a final accent.

Supplies:
Waffle Flower Crafts - Shelves die set
Mama Elephant - Peek a Frame die
WPlus 9 - Happy Wishes stamp set
Honeybee Stamps - Modern Spring 6x6 paper pad
Trinity Stamps - pearls

I invite you to visit our blog for more Peach and Green inspiration.  We would be thrilled to see your card in our gallery!!!

Thanks so much for visiting my little corner of the blogosphere.  Your time and comments are much appreciated.

Jules