Saturday, May 28, 2022

Sisterhood of Snarky Stampers #211


It's another Sisterhood Saturday!  Today we bring to you a very fun prompt which can have many connotations.  W is for Wicked!


My first inkling was to create a witchy Halloween card but after some thought (and stash digging) I decided to try an Audrey Hepburn look with a wicked twist.


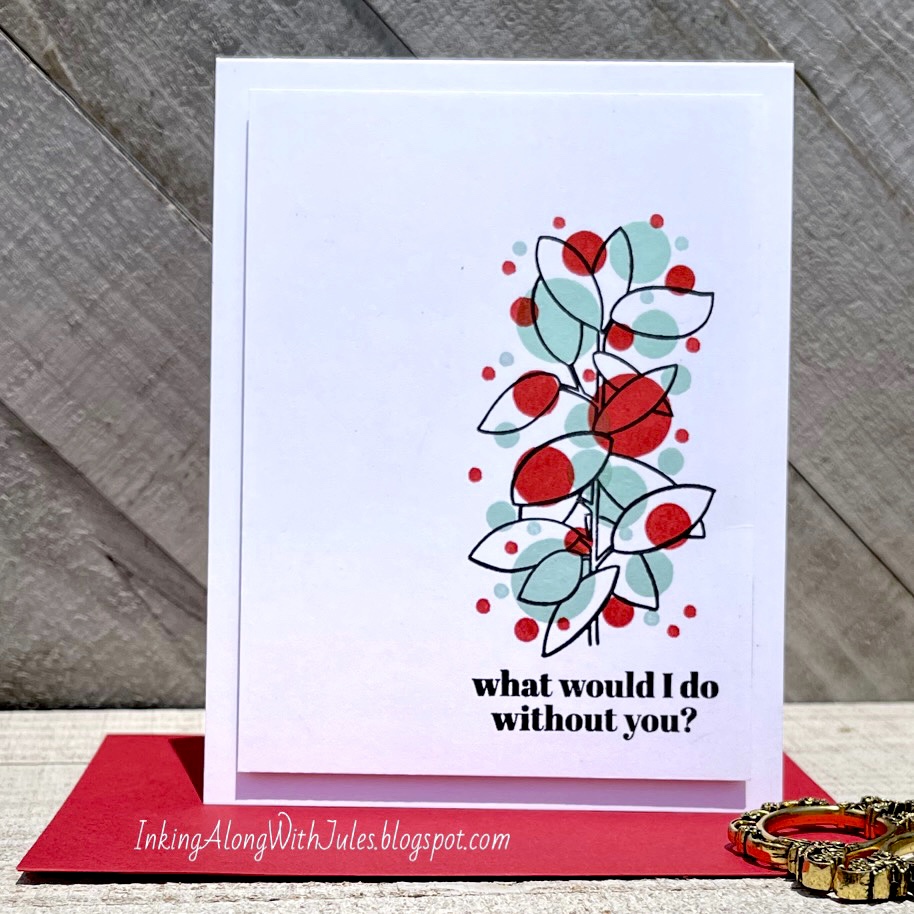
I began by stamping and cutting out Audrey.  I didn't have a stamp to say just what I wanted so I created my sentiment with the help of my computer.  I cut down the cardstock to A2 panel size and then stenciled the path to color match her accessories.  At this point I decided that the background was a bit plain so I ran it through my die cutter with a cover plate die.  I matted the panel onto matching pink cardstock, leaving just the narrowest of borders and then popped it up onto a black card base.  I added the tiny gold stars as a final bit of interest.

Supplies:
Hero Arts MMH April 2017
The Greetery - Pathway stencil
Altenew - Dotty Swirls cover plate
Honeybee Stamps - gold stars
Computer Generated Sentiment

I invite you to visit our blog for more wicked inspiration and hope to see your card in our gallery!

As always, thanks so much for spending a bit of your day with me!

Jules

Thursday, May 26, 2022

Seize the Birthday #239


Happy Thursday everyone !  The Seize the Birthday gang is back with a stenciling challenge.  If toppings aren't your thing any birthday card will do.  My card today features some wonderful washi tape goodies graciously sent to me by my friend Michele.  I'm sure you all know her but if not, I highly recommend that you following her.


Michele did most of the work for me by adhering the washi goodies to white cardstock and die cutting the pieces before mailing so this card was a breeze to create.


I began by lightly adding ink onto a white panel using a pale pinkish/lavender ink through a brick wall stencil.  I then matted this panel onto lavender cardstock leaving a narrow border on all four sides before popping it up onto an A2 card base.  I adhered the washi bouquet to the panel, popped up the preprinted foiled sentiment and added some pretty pearls as accents.  I cannot wait to try out the other pieces she sent to me.  (There will most likely be a purchase in my future but how does one decide?)

Supplies:
Pink Fresh Studio - Anemone Magic washi tape
Pink Fresh Studio - Foiled Sentiments
MFT - English Brick Wall stencil
Trinity Stamps - Pearly Pink, Vivid Veridian, Shimmering Sky pearls

I invite you to visit our blog for much more inspiration.  Lorraine is still guesting with us so be sure to stop by and give her a little bit of love as well.  

Thank you Michele for sharing your wonderful goodies with me today.  As always, my sincere thanks to all of you who are spending a bit of your day with me!

Jules

Friday, May 20, 2022

Grad Cards


I'm back with a drive-by post to share three graduation cards.  


First up is a card I made for my niece who 
just graduated from the University of Florida.

Go Gators!


These next two were created for my nephew 
who graduates from high school this evening.


My apologies for the very short post.  
Please feel free to contact me if you have any questions.  

Thanks so much for spending a bit of your day with me!

Thursday, May 19, 2022

Color Hues #41


The color duo over at the Color Hues challenge blog is one of my all time favorites. I challenged myself to create something a bit different and I'm loving it.


My aqua appears more on the gray side in the 
photo but I assure you it's very aqua.


My first step of the process was to stamp my sentiment. (I do believe that's a first.)  I then stamped the branch vertically above the sentiment and used circle stamps of various sizes to stamp out the random pattern in red and aqua.  I just love the simplicity of this design and it's nice to get a break from Copic coloring.  I cut down the panel, popped it up with craft foam and then adhered it to a white card base.  Very CAS.  (Look Mom!  No bling!)

Supplies:
Penny Black - Groovy Greenery stamp set
Reverse Confetti - Poppies stamp set
Simon Says Stamp - Simply Thank You stamp set   

As always, thanks so much for spending a bit of your day with me!

Jules

Saturday, May 14, 2022

Perfectly CAS May Challenge

This is my second post for today.  Scroll down if you missed my earlier one.  Thanks!

________________________________________________________________________________

It's time once again for our Perfectly CAS card challenge.  Today marks our 27th challenge and we are looking for Distress.  This can be a technique, an emotion, etc.  Or as in my unimaginative state of mind at the time, it was Distress Oxides.


I used my Distress Oxide inks to blend out a panel of white cardstock using different shades of yellows and greens.  I die cut the stems from the blended panel, blended a bit of light blue onto a card front and adhered the stems over top.  I stamped and heat embossed the sentiment onto kraft cardstock strip which I adhered towards the bottom of the stems.  I finished the simple design off with a few pearls.  

I invite you to visit our blog and hope to see your card in our gallery!

Supplies:
Cottage Cutz - Garden Stems die
Hero Arts - Many Everyday Messages stamp set
Trinity Stamps - Pearl Perfections


As always, thanks so much for spending a bit of your day with me!

Jules

Sisterhood of Snarky Stampers


The new challenge at the Sisterhood of Snarky Stampers is a favorite of ours however I need to warn my readers that it may not be your cup of tea.  The prompt is F Words and I used "that one" on my card.  If this offends you, please feel free to skip today's post. 


Are


You 


Ready?

-------------------------------------------------------------------------------------


The inspiration for my card design came from none other than Cathy Zielske.  The sentiment is an older one from her as well.  Please visit this page of her blog to see her chicken and wood plank card.  

I began with the chicken which was stamped, cut and then colored with Copics.  The background texture was created by running a white cardstock panel through my die cutter using a wood grain embossing folder.  I then swiped the textured panel horizontally with a gray ink pad.  I cut the panel down vertically, matted it with some orange cardstock and then adhered it down the center of an A2 card base created from gray cardstock.  The sentiment was stamped with Versamark ink onto a scrap of gray cardstock, heat embossed in white and then die cut using a banner die.  Nothing further needed.  

I invite you to come visit our blog for more F filled inspiration from my fellow Sistahs as well as our Reigning Queen of Snark, Tristan who also had chickens on the brain.  (Love her card!)

Supplies:
Art Impressions - Rooster stampe
Altenew - Deck Planks 3D embossing folder
CZ Design - sentiment stamp 


As always, thanks so much for spending a bit of your day with me!

Jules

Thursday, May 12, 2022

Seize the Birthday #238


Your favorite challenge in the blogosphere *wink* is back today with a new topping. As our name suggests, the Seize the Birthday challenge is just that...a birthday challenge. 

The (optional) topping this fortnight is Stitching, be it real or faux.


As you can see, I chose Faux this time around.  


My card today is super simple.  I stamped the coffee cup image as well as the sentiment onto a square of white cardstock die cut using a stitched die.  After coloring it in with Copics I decided it was just a bit plain so I used my Copics to draw horizontal lines two colors...a marigold color as well as an extremely light blue marker.  I popped up the square onto a white panel and then matted it with a coordinating marigold color before adhering it all onto a white card base.  I am notorious for sending cards out late so I may have to make a few more versions of this one.

I invite you to visit our blog for more inspiration. While there I hope you will welcome the extremely talented Lorraine who is our Surprise Party Guest for the next several weeks.  


NOTE:  We ask that ONLY birthday cards be uploaded to the gallery.  We have been seeing many cards that, while lovely, don't fit our birthday theme and therefore are not considered for selection.  This also includes entries linked to more than five challenges total.  Any card not adhering to our rules is subject to removal from the gallery.  We appreciate all of you and thank you for understanding!  


Supplies:
Ellen Hutson - A Breve Note stamp set
MFT - Stitched Square die set


Thank you so much for spending a bit of your day with me!

Jules 

Sunday, May 8, 2022

Happy LIttle Stampers Die Challenge May 2022


A few days ago I posted my DT card for the Happy Little Stampers Christmas challenge.  As you may know, I'm also on their Anything Goes with Dies challenge so I'm here today to share my most recent card which was truly a labor of love.


I began with a white cardstock panel and took to stamping.  No rhyme nor reason other than I wanted a nice mix of overlapping design and color.  To create some interest I ran my stamped panel through my die cutter using a die that cuts vertical strips in various widths.  I reassembled the design, popping up three of the strips with foam tape for some dimension.  The sentiment was die cut in white and adhered to a shadow created with black cardstock.  All that was left was a random sprinkling of pearls.  I will confess that this card took quite a bit of time but I am in love with the results.

I invite you to visit our blog and hope to see your card in our gallery!

Supplies:
Ellen Hutson - Abstract Nature stamp set
Studio Katia - Halftone Lines die set
Honeybee Stamps - Hello and shadow die set
Studio Katia - Prismatic Sky Pearls
Catherine Pooler and The Stamp Market die inks

Thank you so much for spending a bit of your day with me!

Jules 

Wednesday, May 4, 2022

Happy LIttle Stampers Christmas Challenge May 2022


Well, April sure went by fast!!!  It's time now for a new challenge over at the Happy Little Stampers Christmas blog where the prompt is House.


As luck would have it, I recently took advantage of a sale over at the Ellen Hutson shop where I picked up a fun little Christmas neighborhood set.


I stamped my neighborhood onto kraft ink doing a bit of selective masking in order to fill up the horizontal space on the panel before coloring with Copic markers.  I stamped the sentiment in brown ink for something a bit different and then matted the panel before adhering it to a dark brown card base.  As my final touch I used a stencil and some glimmer paste to represent snow.  

I invite you to come visit our blog and play along!  

Supplies:
Ellen Hutson - Merry Little Christmas stamp set
MFT - Snowfall stencil
Nuvo Moonstone Glitter Paste

Thank you so much for spending a bit of your day with me!

Jules