Tuesday, September 29, 2020

CAS Colours and Sketches #390


Another month has flown right by!  We close out the fifth Tuesday in September with a Double Challenge.  What's that mean exactly?  Well it means that you not only have to work within a color trio but you also need to use that trio on the provided sketch.  Ready?  Here's what we have for you to work with this week.


The fine print ----For our color challenges, you must use all of the stated challenge colors. 
You may add neutral colors; however, the challenge colors should be the most noticeable ones 
featured on your card. We use Stampin' Up color names for reference, but you are welcome 
to use any other companies' products as long as you match the challenge colors as closely as possible.

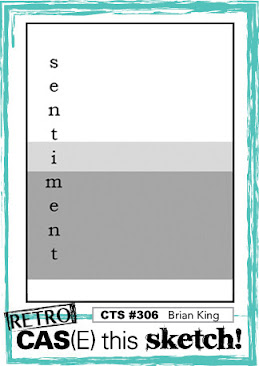
You may rotate or flip the sketch to your liking.  


Based on both the color trio and sketch, here's my card this week.


I adhered a light grey card panel to a white card base leaving a small white border around all four edges.  I die cut the squares and their frames in blue and green shades to match those in the trio.  I framed a rectangular piece of patterned paper with the light shade of blue and then adhered all three pieces to my card front.  I decided it needed a little sumthin' sumthin' so I added some die cut leafy branches on either side.  I added a stacked card stock die cut greeting in dark grey and stamped out the sub sentiment in black onto the same light grey card stock that I used for the panel.  As per my usual, I finished it off with some sequins.  


Come check out our blog challenge and show us your take on this week's sketch! 


Supplies:
Altenew - Fine Frames Squares die set
Simon Says Stamp - Big Thanks Word die
Paper Smooches - Foliage 1 die
MFT Stamps - patterned paper
Pretty Pink Posh - Sparkling Clear Confetti


Stay safe and healthy my friends!  
_________________________________________________________________________

Thank you for visiting my little crevice of the crafty blogosphere.  Your time, comments and friendship are much appreciated.  

Happy Crafting!

Jules 


Sunday, September 27, 2020

Color Hues #2


Today's card was inspired by the color prompt at the Color Hues Challenge blog.  Here is their current color graphic.


Using just two colors is more difficult than one would think.  It's most definitely a challenge.


I began stamping the diamond graphic in Versamark ink onto a panel of navy cardstock after which I heat embossed it with turquoise powder.  I mounted this panel onto a larger white panel die cut with a scalloped die.  I then cut three strips of card stock (white, turquoise and navy) which I adhered to a piece of thin cardstock before running the HUGS die through my die cutting machine.  I stacked the letters onto two additional pieces of navy cardstock to give the sentiment some dimension.  Because it seemed to get lost on the busy background I added a strip of vellum beneath the sentiment before adhering it to the finished panel.  I used the same turquoise cardstock to create the card base and added a few clear turquoise gems to finish it off.


The lettering took on a shiny appearance from the burnishing I did after die cutting similar.  I think it's a rather cool unexpected effect.  


Supplies:

PaperTrey Ink - Cover Up Diamond stamp
MFT - Big Hugs die 
American Crafts - Zing embossing powder in aqua
Mama Elephant - Femme Frames scalloped die
Studio Katia - turquoise gems


Stay safe and healthy my friends!  

_________________________________________________________________________

Thank you for visiting my little crevice of the crafty blogosphere.  Your time, comments and friendship are much appreciated.  

Happy Crafting!

Jules 


Wednesday, September 23, 2020

Inspired By #142

 A quick post to share my card for the current Inspired By inspiration photo of Playful Patterns.


The scallops on this pillow translated into Jack-O-Lanterns in my mind so without further ado...


I die cut nine pumpkins from four different colors of cardstock and then randomly stamped them with three different Jack-o-Lantern faces.  The face of the middle one is heat embossed in white and popped up with foam tape.  The sentiment is also heat embossed in white onto the black panel.  This was a little time consuming with the die cutting since I only used one pumpkin die but otherwise it's a very quick and easy card to create.

Supplies:
ArtC - Jack-o-Lantern stamp and die
Ellen Hutson - Got Candy stamp set 


Stay safe and healthy my friends!  
_________________________________________________________________________

Thank you for visiting my little crevice of the crafty blogosphere.  Your time, comments and friendship are much appreciated.  

Happy Crafting!

Jules 


Tuesday, September 22, 2020

CAS Colours and Sketches #389


It's time for a new sketch over at the CAS Colours and Sketches challenge blog.  YoonYoung has created another fun one for us to play with.  Here's her sketch....


You may rotate of flip the sketch to your liking.


And here's my card....


I began with a pool colored card base to which I added a die cut panel of white which allows the blue to peek through horizontally.  I used three sentiment strip dies in three different widths to create the vertical stripes.  It's difficult to see but I did some ink blending onto the same blue card stock going a bit heavier handed toward the bottom of the strips.  I die cut the thanks in white and the shadow in black and finally added a few enamel dots in a matte finish to embellish the card a bit.

Come check out our blog challenge and show us your take on this week's sketch!  

Supplies:
Altenew - Gradient Stripes cover plate die
Simon Says Stamp - Thanks and Shadow die
Gina Marie - matte enamel dots


Stay safe and healthy my friends!  
_________________________________________________________________________

Thank you for visiting my little crevice of the crafty blogosphere.  Your time, comments and friendship are much appreciated.  

Happy Crafting!

Jules 

Saturday, September 19, 2020

Sisterhood of Snarky Stampers - #169

It's time for another challenge over at the Sisterhood.  This time around our prompt is S is for SLIDER.  


If your mind immediately went in to the gutter, well, then you're our kinda person.  If not, there are many ways to interpret this prompt and still have fun playing along.  Personally I've never created a card with a sliding mechanism so I combined my potty brain with a bit of simple engineering to create this fun card.


Because I didn't take photos of my process I won't be going into details on how to create this interactive card.  I highly recommend that you watch this video by Julie Ebersole if you're interested in making one of your own.  She explains it far better than I ever could.

In an nutshell, you create a channel and adhere your design elements onto a pull tab that reveals your sentiment.  Ready for the reveal? 


Did you really expect anything less from me?  


I stamped and fussy cut six rolls of premium toilet paper (no single ply for me, thank you very much!) and adhered them to the pull tab.  The background was created with an old piece of black and white designer paper and I finished off the design with a few mini silver star embellishments.  


Here's a close up for your viewing pleasure.  
I think I'm going to have a hard time parting with this card.  


I do hope you'll come play along!  There are many ways to interpret this prompt.  A playground slide.  A hamburger slider.  A slider card like mine.  Or if you're adventurous...anything slippery.  *wink*  Have some fun with it.


Supplies:
Ellen Hutson - Voices in my Head Accessories
CZ/Simon Says Stamps - Salty Ladies #1
random piece of striped patterned paper


Stay safe and healthy my friends!  
_________________________________________________________________________

Thank you for visiting my little crevice of the crafty blogosphere.  Your time, comments and friendship are much appreciated.  

Happy Crafting!

Jules 


Wednesday, September 16, 2020

CAS(e) This Sketch #306


Today's card was created with the current CASe This Sketch challenge in mind.   I like the horizontal lines however I was initially put off by the design of the sentiment.


I'm not big on vertical sentiments and rarely, if ever, incorporate them into a card design.  After seeing Michele's card however I thought maybe I could pull off something that I would be happy with.  


I chose my color palette before I decided on a card design which is highly unusual for me.  I dug through my older stamp sets and found this set of brush strokes which worked perfectly.  I don't have a big selection of alpha dies but what I do have is an obnoxious collection of Thickers that I still hoard from my scrapbooking days. *blush*  I found this set with an antique gold finish in a font that I felt matched the feel of the card.  Staggering the letters slightly gives just even horizontal balance to the vertical placement of the sentiment. I can live with this.  *wink*  I mounted the white panel on a piece of coordinating antique gold cardstoc cut down from a very old piece of 12x12 paper.    

Supplies:
PaperTrey Ink - Brushed Off stamp set
American Craft - Thickers
Paper Pizazz - metallic gold cardstock

I'm very happy with the outcome and even more pleased that I dusted off some very old supplies.  I need to do that more often!

Stay safe and healthy my friends!  

_________________________________________________________________________

Thank you for visiting my little crevice of the crafty blogosphere.  Your time, comments and friendship are much appreciated.  

Happy Crafting!

Jules 


Tuesday, September 15, 2020

CAS Colours and Sketches #388


Is anyone experiencing fall weather yet?  If so, I'm really jealous.  Here in South Florida we have what  I refer to as Faux Fall which basically means we pretend it's 60 degrees out when we drink our pumpkin spice lattes.

To get you in the Autumnal Spirit we have a new color challenge for you over at the CAS Colours and Sketches challenge blog.  This color combo just screams fall to me.  


The fine print ----For our color challenges, you must use all of the stated challenge colors. 
You may add neutral colors; however, the challenge colors should be the most noticeable ones 
featured on your card. We use Stampin' Up color names for reference, but you are welcome 
to use any other companies' products as long as you match the challenge colors as closely as possible.


My last couple of cards have veered away from my "go to" style of Clean and Simple but I'm back on track with today's card.  It's ridiculously simple but I love it so much!


I began by stamping the glass of bourbon onto both my card front as well as a piece of masking paper.  I covered the bourbon with the mask and then stamped out the wine and the martini. This stamp set has a very modern feel to it so I added just a hint of alcohol marker coloring to the beverages. I wanted a versatile greeting and Happy Whatever just seemed to fit the bill.  I finished it off the design with a few sequins.

Told ya it was ridiculously simple. 

Come show us what you got this week!


Supplies:
Ellen Hutson - Voices in My Head Accesories stamp set
Hero Arts - Off Beat Holiday stamp set (greeting)


Stay safe and healthy my friends!  
_________________________________________________________________________

Thank you for visiting my little crevice of the crafty blogosphere.  Your time, comments and friendship are much appreciated.  

Happy Crafting!

Jules 


Monday, September 14, 2020

Seize the Birthday #199


You all know how I love my die cut only cards so the current challenge over at the Seize the Birthday blog was a no brainer for me.  


I followed their directions to a T and used all die cuts with the exception of the stamped sentiment.  


I used different colors of card stock on my mailbox but chose to cut the mailbox itself plus the two envelopes from white card stock.  I shaded in the mailbox a bit and colored the envies in blue, adding a bit of white gel pen to accentuate the embossed lines.  I did a bit of shading on the grass as well. The background was created using Distress Oxide inks and the panel was adhered to a soft grey card base.  The sentiment was heat embossed in white onto the same red card stock I used for the flag and hearts.


Supplies:
MFT - Mailbox die
MFT - Bitty Birthday Wishes stamp set
Distress Oxides


Stay safe and healthy my friends!  

_________________________________________________________________________

Thank you for visiting my little crevice of the crafty blogosphere.  Your time, comments and friendship are much appreciated.  

Happy Crafting!

Jules 


Saturday, September 12, 2020

Tic Tac Toe Challenge #081


Popping in real quick to share the card I created for the current TicTacToe challenge. They have a Fall/Halloween inspired board this week.  


I went with the diagonal elements of Truck, Pumpkin and Plaid to create my card.


The green plaid background is an older piece of patterned paper.  I adhered it to a side folding card base and then added a gridded die cut panel over the top.  I stamped, Copic colored and die cut the truck and pumpkins.  The pavement was created by ink blending over a stamped image.  I grounded the truck on the image and then added the sentiment strip underneath.  To maintain the the masculine vibe, I held myself back from adding any embellishments....and trust me, it was hard.  


Supplies:
Honeybee Stamps - Little Pickup stamp set and dies
Altenew - Many Thanks stamp set
Ink Blot Shop -  Get Grounded stamp set
Altenew - Layered Plaid Plate B cover die


Stay safe and healthy my friends!  

_________________________________________________________________________

Thank you for visiting my little crevice of the crafty blogosphere.  Your time, comments and friendship are much appreciated.  

Happy Crafting!

Jules 

Friday, September 11, 2020

Inspired By #141


This sweet image posted yesterday on the Inspired By challenge blog really caught my attention.  I'm usually not one for Shabby Chic but the prints on the tea cups drew me right in.  


The fact that I happen to have just the right stamp set didn't hurt either.  *wink*  Here's what I created.


As you can see, I took the inspiration board quite literally.  I have tea cups, a branch, a bird and shabby chic colors and patterns.  

I began by stamping my images onto some really old but absolutely perfect patterned paper.  I didn't have the perfect paper for the floral image so I stamped it out onto the same subtle cream paper as the top cup and then quickly colored it in with Copics.  I used rustic cream card stock for both my panel and card base.  I did some ink blending to accentuate the edges of the panel as well as to color my sentiment strip.  I adhered the elements to the panel, popping up the branch and the bird and then adhered the panel to the card base.  I added a sprinkling of clear droplets to finish it off.  

This is a very different look for me.  It's good to try new things and I'm really pleased with the outcome.                                                                                                                                                                                                                                                                                                                                                                                                          

Supplies:
WPlus9 - Hello and Thanks Stamp and Die set  
WPlus 9 - Handlettered Hello stamp set (sentiment) 
PaperTrey Ink - Rustic Cream card stock   
Distress Oxide - Tattered Rose
Ellen Hutson - clear droplets  


Stay safe and healthy my friends!  

_________________________________________________________________________

Thank you for visiting my little crevice of the crafty blogosphere.  Your time, comments and friendship are much appreciated.  

Happy Crafting!

Jules 


Tuesday, September 8, 2020

CAS Colours and Sketches #387


It's time once again for another challenge over at the CAS Colours and Sketches blog.  This week we have new sketch for you to try.


I decided to create a portrait style card rather than the landscape one shown in the sketch.  


I had a new background stamp that I was itching to use.  I stamped it onto both kraft and red card stock in ink colors just slightly darker than the card stock itself.  I then stamped, colored (COPICS) and fussy cut out five tacos to serve as my focal image.  I added some skinny strips of card stock to define the border between the two crackle backgrounds and added a stamped greeting to a piece of card stock I colored yellow to match the taco shells.  

This would have been a fairly CAS card had I not gone for the crackling but I really do think it adds to the overall theme of the card.  I'll probably be sending this one out to my taco loving grandson.  

Supplies:
Simon Says Stamp - Crackle background stamp
Concord & 9th - Special Delivery

This is a simple sketch with so many possibilities.  I hope to see your cards in our gallery!


Stay safe and healthy my friends!  
_________________________________________________________________________

Thank you for visiting my little crevice of the crafty blogosphere.  Your time, comments and friendship are much appreciated.  

Happy Crafting!

Jules 


Monday, September 7, 2020

CAS(e) This Sketch #388

There are so many wonderful challenge blogs and even with all of my free time nowadays, there just isn't time enough to join in them all.  I really love the new sketch up over at the CAS(e) This Sketch blog this week so I bumped it up the challenge list.  


I knew just what stamp set I wanted to use which made it very easy.


I started by stamping the large floral image in Memento Tuxedo Black ink and colored in my image with Altenew alcohol markers.  I added a splattering of black ink for some added detail.  I die cut the banner and label, adding the sentiment with a combination of Versamark ink and white embossing powder.  Very simple but very pretty, in my opinion at least.  *wink*


Supplies:
Altenew - Delicate Bouquet stamp set
Altenew - Fresh Freesia stamp set (sentiment)
Spellbinders - label die


Stay safe and healthy my friends!  
_________________________________________________________________________

Thank you for visiting my little crevice of the crafty blogosphere.  Your time, comments and friendship are much appreciated.  

Happy Crafting!

Jules 


Saturday, September 5, 2020

Sisterhood of Snarky Stampers #168

A big thank you to all who played along with Edna's Ocean theme this past fortnight.  Today she has a new challenge for you over at the Sisterhood of Snarky Stampers blog.


The new prompt is F is for FRIENDS.  


I pulled out another NBUS stamp set and got to work.  I thought this one was perfect for the challenge.  And in case you're wondering, I'm the one with my legs up in the air.  Ha!


I began by first stamping the image onto a panel of Neenah Solar White 80 lb card stock using Memento Tuxedo black ink.  I then colored in the gals and their accessories using COPIC alcohol markers. I used the B000 marker to create the illusion of water around them.  The sentiment letters were die cut from an alpha set and adhered to a strip of black card stock.  Both panels were glued to the front of a pool colored card base.  I used a white gel pen to add some finishing accents to the coloring.

I hope you'll come and join us in the gallery!  As you can see by my card, snark is not a requirement to play and we'd love to see your creations!


Grab our badge to display on your blog.

Supplies:
Art Impressions - stamp
MFT - Little Lowercase Alpha dies
COPIC alcohol markers

Stay safe and healthy my friends!  
_________________________________________________________________________

Thank you for visiting my little crevice of the crafty blogosphere.  Your time, comments and friendship are much appreciated.  

Happy Crafting!

Jules 

Friday, September 4, 2020

Tic Tac Toe Challenge #080


Today's card was created with the new TicTacToe challenge in mind.  Here is this week's board.


I went straight across the top row, choosing Stripes, Masculine and Blue as my elements.  


My card is heavy on the card stock die cuts today.  I used dies to create the waves, the sailboat and the sun, putting them all together on a white panel to create an ocean scene.  The background was created using a striped background stamp.  I heat embossed the image in white onto a panel of blue card stock.  The sentiment was also heat embossed in white but onto a strip of black cardstock.  I adhered the whole thing to a card base made from Neenah Solar White 110 lb weight.  While this card could definitely go to a female friend, I think the nautical theme is perfect for a masculine card.  

Supplies:
MFT Sailboat die
MFT Striped background stamp
Impression Obsession - Wavy Edge dies
Altenew - Birthday Greeting stamp set


Stay safe and healthy my friends!  
_________________________________________________________________________

Thank you for visiting my little crevice of the crafty blogosphere.  Your time, comments and friendship are much appreciated.  

Happy Crafting!

Jules 

Thursday, September 3, 2020

Color Hues Challenge #1


There's a new challenge in town and two of the inaugural designers (Lindsey and Carol) happen to be friends of mine.  How can I not play?

The challenge is called Color Hues and the idea is to use only the two colors stated along with neutrals.


I went with an ink blended background in an ombre' from yellow to dark green.  


I've played along with many three color challenges but this is a first with only two colors.  It's not as easy as it may seem.  

To create the background I first heat embossed a leaf background stamp in white onto a panel of smooth white card stock and then did some Distress ink blending over top to create the gradient. I used the same green inks to tint a scrap piece of white card stock which I used to create the open leaf die cut, adhering it to the left side of the panel.  I die cut the sentiment from dark gray card stock, stacking it three layers high and adhering it along the bottom portion of the panel.  I also die cut a small border from the same gray card stock which I used as an inner frame.  This whole thing was then matted onto a scalloped border panel and adhered to a dark gray card base. A sprinkling of clear sequins finished it off.

Supplies:
Hero Arts - Tropical Foliage background stamp
Pink Fresh Studio - Leafy Branches
Simon Says Stamp/CZ Design - Hello die
Wplus 9 - Sunshine Layers die set

If you have a chance, come show these gals and this new challenge some support!  

Stay safe and healthy my friends!  
_________________________________________________________________________

Thank you for visiting my little crevice of the crafty blogosphere.  Your time, comments and friendship are much appreciated.  

Happy Crafting!

Jules 

Tuesday, September 1, 2020

CAS Colours and Sketches #386

Can you believe it's the start of a new month?  Wow!  Time flies, even in Covid.  YoonYoung is our hostess for September and she's starting the month out with a very interesting color challenge.  


The fine print ----For our color challenges, you must use all of the stated challenge colors. 
You may add neutral colors; however, the challenge colors should be the most noticeable ones 
featured on your card. We use Stampin' Up color names for reference, but you are welcome 
to use any other companies' products as long as you match the challenge colors as closely as possible.


What do you think?  I will admit that I was a bit stumped in the beginning.  In the end I chose three colors of card stock that closely match the challenge colors and decided on a vertical striped background.


I "cheated" and used a cover die rather than a paper trimmer to create my very even strips. Using my ATG I added an excessive amount of adhesive onto a thin piece of typing paper to which I added the strips of colored card stock in vertical fashion.  I then adhered the finished piece to a card base of rustic white card stock, adding the thin horizontal strips of gray to finish off the look.  To keep it simple I added the die cut butterfly tree and then a horizontal sentiment stamped in black onto the same rustic white card stock.  I will probably reserve this as a masculine thank you card although it could be sent to anyone.   

Supplies:
Studio Katia - Halftone Lines cover die
Spellbinders - Tree die
Avery Elle - Thanks sentiment stamp set


I hope to see you in our gallery this week!


Stay safe and healthy my friends!  
_________________________________________________________________________

Thank you for visiting my little crevice of the crafty blogosphere.  Your time, comments and friendship are much appreciated.  

Happy Crafting!

Jules