Showing posts with label GDT. Show all posts

Saturday, January 14, 2023

Just Us Girls #662


Today I'm sharing my second Guest DT card for the Just Us Girls challenge blog.  The theme for this week is Heart.   


Look at me getting all fancy-like making a shaker window.  *wink*


The first step to creating this card was to die cut a circle opening into the center of a white cardstock panel.  I then stamped the sentiment below the opening before proceeding with the shaker elements.  

I die cut an open ring from red cardstock which I placed around the opening as a border.  Hidden behind the pink die cut is an MFT circle shaker bubble.  For me, this is the easiest way to make a shaker card.  I placed some shaker bits into the plastic bubble before adhering the panel onto the card base and then glued the pink die cut over top.  I'm not sure my instructions are all that clear so if you have any questions, please ask.  

Supplies:
Honeybee Stamps - Gal Pal stamp set
MFT Stamps - Oceanview Porthole die
MFT Stamps - Pinpoint Heart Circle die
MFT Stamps - Circle Shaker Bubble insert

I'm delighted to be part of this wonderful blog this month. There are some wonderful examples from the DT and I invite you to come take a peek and share your Heart Themed card in the gallery.

As always, thanks so much for spending a bit of your day with me!

Jules


Saturday, January 7, 2023

JUGS #661 - January Guest Designer


I was thrilled to be invited as the January Guest Designer for the Just Us Girls challenge blog.  As a member of several Design Teams myself it's often difficult to fit in the time to play along with other challenges but this is one of my top go-tos when my time does allow.  Love these ladies and their challenges!

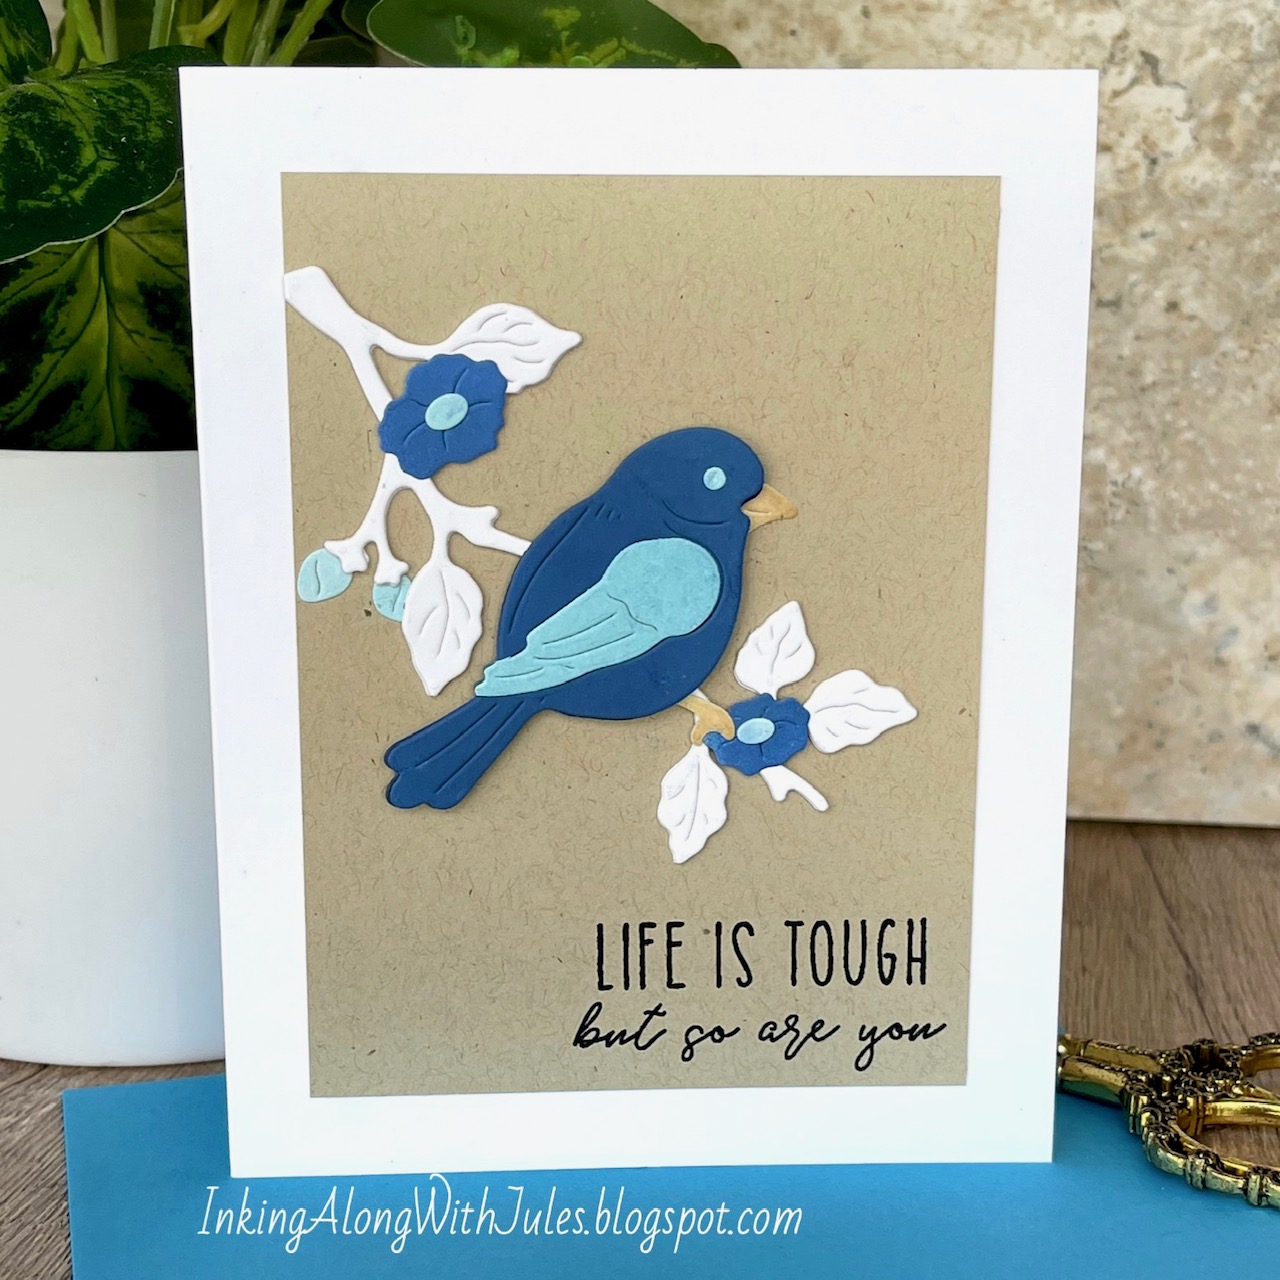
This week's prompt is a color challenge.  I'm sure you can probably guess it from my card below...


I die cut my images from white cardstock and then blended the bird and flowers with Distress Oxides.  I decided on their position on my kraft panel and then stamped the sentiment in a crisp black pigment ink.  The panel was then adhered to a heavy weight white card base.  I wanted to keep this encouragment card simple so I resisted the urge to add clear droplets.  

Supplies:
Cottage Cutz - Bluebird die set
Reverse Confetti - Sentimental Sayings stamp set

I invite you to visit this week's blog post and hope you'll join in on the fun.  Thanks so much to the JUGS team for the invite!  I'll be back next week with another Guest DT post.  

As always, thanks so much for spending a bit of your day with me!

Jules
Saturday, January 16, 2021

Color Hues #10 - Guest Designer


Good morning!  I'm delighted to have been asked to be a guest designer on the Color Hues challenge blog this fortnight.  It's been great to have a few new card challenges emerge in 2020 and this one has been a favorite.  As a bonus, their Guest Designer badge is super fun.  *wink*


I have really been loving their chosen color duos lately and this one lends itself to so many  wonderful opportunities for designs.


I am in need of masculine cards for all occasions so I took the opportunity with these colors to create a simple one with some geometric layers.


Using just the two colors (no hues this time around) I began with a navy card base and a smaller panel of cream cardstock.  Each of the plaid geometrics (there are two side by side) were cut from these same two colors.  There are three layers to each mini panel which I stacked by alternating the two colors.  I adhered the two layered mini panels side by side to span my panel and centered them top to bottom on the card front.  I added a die cut sentiment/shadow using the same two cardstocks and finished it off with a sub-sentiment, heat embossed in cream over the navy.  I really had to reign myself in and NOT add any drops, dots, jewels and/or bling to this card as that would have totally defeated my purpose.  (And hence is why I have so few masculine cards.  My desire to bling is too great.  LOL!)


Supplies:
Spellbinders - Kaleidoscope Plaid dies
Ellen Hutson - That Thing That You Do stamp set
Simon Says Stamp - Thanks plus outline die
Wow - Skinny Chai Latte embossing powder


Thank you so much to Nancy and her team for inviting me to play along with their very fun (and indeed challenging) challenge!  I hope you'll be inspired to create a navy/cream card and play along with their blog.


It's a New Year!  Continue to stay safe and healthy my friends.   

_________________________________________________________________________

Thank you for visiting my little crevice of the crafty blogosphere.  Your time, comments and friendship are much appreciated.  

Happy Crafting!

Jules 


Thursday, January 7, 2021

Seize the Birthday #205 - Guest Designer


I am very excited to be back guest designing for one of my favorite challenges, Seize the Birthday.  Who amongst us doesn't need a constant stash of birthday cards, right?  Any birthday card works for their biweekly challenges but I always enjoy creating cards with their toppings prompt which this time around is Snowy Background.


There is zero chance of snow here in South Florida so I welcome all opportunities to use my snowy stash items.  Here's my card for today...


I had a lot of fun with this one!  I began by applying texture paste to dark navy cardstock using a snowfall stencil.  I immediately added some diamond dust to the wet paste for some wintery sparkle and then set it aside to dry while I worked on critters.  

I stamped, colored (Copics) and die cut my polar bear, penguin and rabbit along with a trio of fir trees.  I created a ski slope using a border die and white cardstock.  I stamped the sentiment and then assembled my scene onto a white card base.  As a finishing touch, I added some white glitter glue under their snowboards and along the slope.  I think this came out really cute and it was fun to create something a bit different.

I invite you to check out all of the wonderful inspiration on the STB blog and hope you'll play along!  

Supplies:
MFT - Ready, Set, Snow stamp set
Simon Says Stamp - Falling Snow stencil
Ranger - Texture Paste
Twinklets Diamond Dust

It's a New Year!  Continue to stay safe and healthy my friends.   

_________________________________________________________________________

Thank you for visiting my little crevice of the crafty blogosphere.  Your time, comments and friendship are much appreciated.  

Happy Crafting!

Jules 

Thursday, November 5, 2020

Guest Designer - Seize the Birthday #203


I am delighted to share that I've been invited to be the Guest Designer over at the Seize the Birthday challenge blog for the months of November and January.  (As an aside, can 2021 even come fast enough?  Seriously.  I'm so over 2020.) 


If you follow me here and on Instagram you know that I've been a loyal participant for quite some time.  Birthday cards are what I send out the most and their challenge certainly helps keep me well stocked.  

If you're not familiar with their challenges the only real rule is that you create a birthday card however they always add a "topping" which is basically a prompt for the challenge.  The topping for this fortnight is 1, 2, 3.  


1 die cut or punch
2 colors (excluding neutrals)
3 embellishments (same or different)


I'm not gonna lie.  This is more difficult than it first appears.  Selecting the die was my most difficult choice.  After that things just fell into place.  


I began with the sand dollar die (Topping 1) which I cut from rustic cream cardstock.  I cut four of them and adhered them together to create dimension, saving the little bits to pop back in later.  My next step was to ink blend a background using Distress Oxides (Topping 2).  The top of the panel is Cracked Pistachio while the bottom is Broken China.  The color in the middle is the result of overlapping of the green and blue.  I adhered the blended panel onto a card base of the same rustic cream used for the sand dollar.  I added a single layer of the little bits to finish the die cut.  I stamped the birthday greeting in crisp black pigment ink and then added three clear droplets (Topping 3) to finish the card off.  I live in a beach town so this card is basically perfect for any of my local friends.  

I hope you'll come play along with the challenge.  I mean, who doesn't make birthday cards, right?  

My thanks to Nancy and her team for inviting me to play along.  

Supplies:
Reverse Confetti- Sand Dollar die
Reverse Confetti - Work Up (sentiment)
PaperTrey Ink - Rustic Cream cardstock (one of my all time favs)
Ranger - Distress Oxide inks

Stay safe and healthy my friends!  
_________________________________________________________________________

Thank you for visiting my little crevice of the crafty blogosphere.  Your time, comments and friendship are much appreciated.  

Happy Crafting!

Jules