Tuesday, April 28, 2020

Online Card Classes - Day 12


Jennifer McGuire was the hostess of Day 12 of the Spring Card Camp over at Online Card Classes website.  I ended up making seven cards with her technique so today they get their own blog post.  I sharing six of the cards and holding my favorite to send to my mama for Mother's Day.  Let's dive right in.


I rarely use orange as it's not a favorite of mine but given all of the cards I've been creating lately, I thought I'd give it a whirl.


I do like the orange however my favorites of the bunch are the cards I created with the blues and greens.  I went with a mix of different sentiments so I have lots of options. 


Her technique was extremely messy and I had blue fingers for days but I am very pleased with how these cards turned out.  I'm still chugging away and will be back in a day or so with more to share.

I'll be back in a few days with more cards from the class.  Please leave any questions about the products I've used in the comments and I'll get back to you.  

Stay healthy my friends!  
_________________________________________________________________________

Thank you for visiting my little crevice of the crafty blogosphere.  Your time, comments and friendship are much appreciated.  

Happy Crafting!

Jules

CAS Colours and Sketches #368


It's just another Tuesday in the new world of social isolation.  Thankfully we have home hobbies!  Today we have a new sketch up over at the CAS Colours and Sketches challenge blog.


It's simple, sweet and to the point which is exactly how I kept my card.


As most of you will probably guess, this one will be going to my grandson.  I miss him something terribly.

I hope you'll get a chance to play along!


Supplies:
MFT - Stamps and Cloud Stencil

Stay healthy my friends!  
_________________________________________________________________________

Thank you for visiting my little crevice of the crafty blogosphere.  Your time, comments and friendship are much appreciated.  

Happy Crafting!

Jules


Sunday, April 26, 2020

Online Card Classes Days 8-10


Yes, I'm still chugging away with the Jennifer, Kristina and gang over at their Online Card Classes website.  Today I'll be quickly sharing my creations for Days 8 - 10.  (Even in the days of social isolation it's still so danged hard to keep up crafting, photographing and posting! LOL!)


Day 8 was hosted by Cathy Zielske.  I have two cards, 
using her watercolor technique with positive and negative elements.


Day 9 was hosted by Channin Pelletier.  
She demonstrated a stencil technique netting two cards.


Day 10 was hosted by Lydia Fiedler.  
She created two cards using circles and glitter paste.


I'll be back in a few days with more cards from the class.  Please leave any questions about the products I've used in the comments and I'll get back to you.  

Stay healthy my friends!  
_________________________________________________________________________

Thank you for visiting my little crevice of the crafty blogosphere.  Your time, comments and friendship are much appreciated.  

Happy Crafting!

Jules


Wednesday, April 22, 2020

Online Card Classes Days 5-7


I'm really enjoying the videos over at the Online Card Classes Spring Card Camp and will be very sad once they're over.  Today I'm going to quickly share with you the cards I created for Days 5, 6 and 7 of the class.


Day 5 was hosted by Debby Hughes and if you're a follower, you know she's a fabulous watercolor artist.  I did my best "a la Debby" to create the cards below using the design she shared in the class.


While I had my paints out I made two more cards, more in the "a la Julie" CAS style.  I stacked the sentiment using five layers of the dies which really gave these simple cards an added oomph.


Day 6 was once again hosted by Kristina Werner.  Her examples used watercolored pieces but I wanted to use some "new to me" pieces of design paper.  Super easy but really pretty.


Day 7 was hosted by Laurie Willison, another CAS card maker that I love.  I went 
a step further in my card by adding glimmer paste to my stenciled background.


I'll be back in a few days with more cards from the class.  Please leave any questions about the products I've used in the comments and I'll get back to you.  

Stay healthy my friends!  
_________________________________________________________________________

Thank you for visiting my little crevice of the crafty blogosphere.  Your time, comments and friendship are much appreciated.  

Happy Crafting!

Jules

Tuesday, April 21, 2020

CAS Colours & Sketches #367


Good morning friends.  I hope everyone is still doing well during our Forced CoronaCation.  It's Tuesday once again and time for another color challenge at the CAS Colours and Sketches blog.  Patricia has picked out some awesome colors for us to use.  


The idea is to create a card using the three colors illustrated above it.  As always,
 you may use whatever brand of ink, cardstock, markers, etc you have in your stash
as long as they're similar to the Stampin' Up ones named above.  You are also free to 
add neutrals but this trio of colors should be the only other ones used on your card.  


This color combo made my little heart go pitter patter so I have not one, but two cards for you today.  

On the CC&S blog today you'll see this card:


I created it by die cutting leaf branches in the three different colors illustrated in the challenge.  I traced around a circle die so that I could get my placement in a nice wreath arrangement, alternating the three colors.  I stamped the sentiment on a smaller circle and placed it in the middle of the wreath.  I finished it off with some enamel dots in four colors.  (The three challenge colors along with white.)  I'm really happy about how this turned out.

There is another leaf branch die in the set and because I had extra cardstock I decided to make another card.  This second one isn't quite as CAS but I love it too.


For this card I arranged the larger leafy branches to cover the card front.  I added in a green heart wreath which I centered in white.  I added the sentiment to the center and again finished it off with the same four colors of enamel dots.  I can't decide which I love better.  (A good thing, right?)

Supplies:
Paper Smooches - Foliage 1 die set
Altenew - Fresh Freesia stamp set (sentiment)
Avery Elle - Banner Bits stamp and die set
Avery Elle - Heart Frame
Nuvo - liquid enamel dots
Assorted cardstock manufacturers


I hope to see you in the gallery this week!


Stay healthy my friends!  
_________________________________________________________________________

Thank you for visiting my little crevice of the crafty blogosphere.  Your time, comments and friendship are much appreciated.  

Happy Crafting!

Jules


Sunday, April 19, 2020

Seize the Birthday #188


The folks at the Seize the Birthday challenge are doing something a bit different this time around.  Their current theme is Seize the Heros. With so many wonderful companies offering health care worker images as free downloads there's no reason whatsoever not to join in on honoring our front line heroes .  (I have three such heroes in my immediate family and worry about them every. single. day.)


I chose to combine an online nurse freebie from My Favorite Things with one of their stamp sets that I physically own to create my card.


I thought it would be nice to combine the caregiver with her sweet recuperating patient for something a bit different.


I colored the images with Copic markers and added them to a background of old patterned papers.  I much prefer their cozy background to the sterility of most hospitals, don't you?  

A big shout out to MFT for their generous downloads!  Thank you!


Supplies:
MFT - all images and stamps 
Penny Black - floorboard die


Stay healthy my friends!  
_________________________________________________________________________

Thank you for visiting my little crevice of the crafty blogosphere.  Your time, comments and friendship are much appreciated.  

Happy Crafting!

Jules


Saturday, April 18, 2020

Sisterhood of Snarky Stampers #158


Life is different, that's for sure.  Before we get to today's new challenge I'd like to revisit my last Snarky Sisterhood post.  Remember when I spoke about the 45 rpm spider on my retro post?  Well look who recently did a quick FB video (...or was it IG?)  None other than one of my current top three authors...Harlan Coben.  And notice what he's wearing?


I am still so bummed that his meet and greet here locally was canceled in March. *sigh*  But see, we're spirit animals.  :-)  And that newly released book he's holding was really good.  I gave it 4.5 out of 5 stars on my bookstagram account.

*** In case you're wondering my three favorite authors are Harlan Coben, Karin Slaughter and Attica Locke.  I highly recommend most anything by them.***

________________________________________________________________________________

Ok...now to today's card.

We have a new challenge up at the Sisterhood of Snarky Stampers challenge blog.  Now more than ever, families are letting nothing go to waste and Edna is doing her part to both upcycle and remain fashionable.   


U is for Upcycle
WTG Edna!


According to Dictionary.com the definition of upcycle is:

To process (used goods or waste material) so as to produce something that is often better than the original.

You can see that Edna has re-purposed some ribbon for her belt and jazzed up her plain black slippers with colorful old buttons. I borrowed her ribbon idea taking some previously used ribbon from my stash and reusing it on an Easter card for my grandson.


I also "upcycled" a very well known cartoon image that's floated around the internet for years.  It happens to be the perfect five year old boy humor and it is my belief that my version is indeed better than the original.  (Don't burst my bubble, folks.)


Classic Chocolate Easter Bunny Joke: "My Butt Hurts. What!?" 


I began by hand drawing the bunny images onto Neenah Solar White 80 lb cardstock, cutting them out using my Brother Scan and Cut, and then coloring with Copic markers.  (I imitating the texture on the cartoon image to the best of my feeble abilities.) I tied the old ribbon into bows and fastened them with several mini glue dots.  The eyes and flowers were created with Nuvo Drops.  I hand stamped the "conversation" with individual alpha stamps, colored some Easter eggs and added everything to an outdoor-sy panel.  

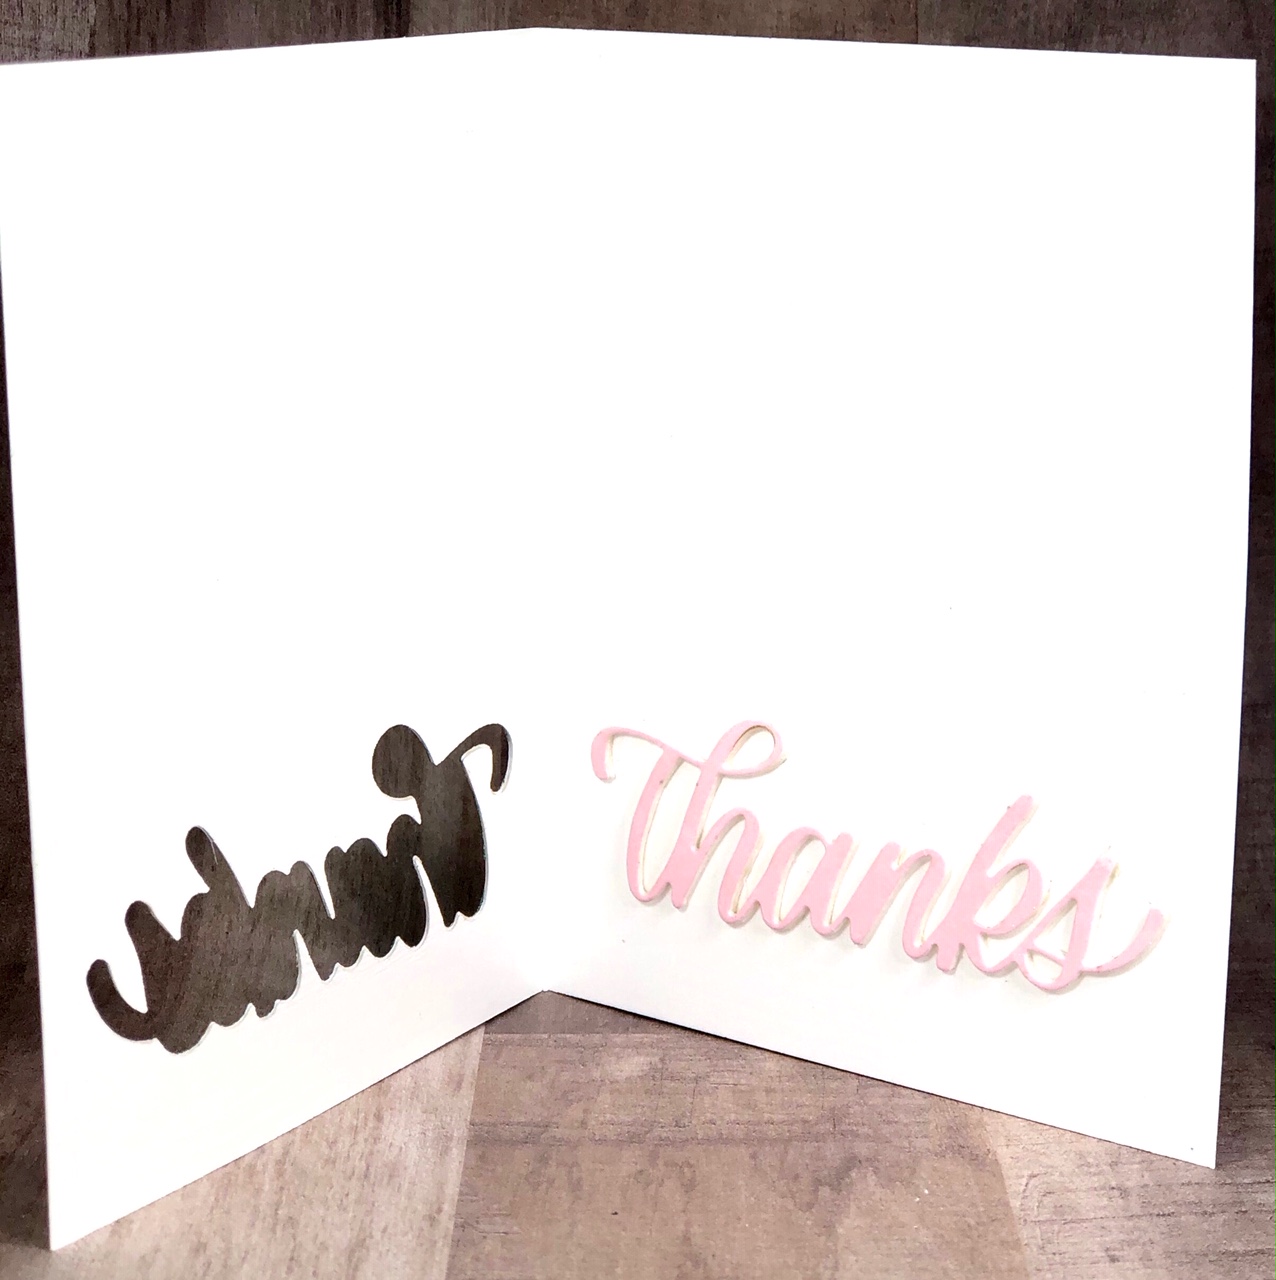
Here is a look at the inside of the card:


This is something we always say to each other so it's eggstraspecial.  (Like how I did that?  LOL!)

Supplies:
Bunny Rabbits - hand drawn by Jules  
MFT Stamps - Tucked in Turf die 
Tonic Nuvo Drops
The Greeting Farm - Eggstraspecial stamp set (eggs)
Honeybee Stamps - Sentiment Alpha stamps
Gerda Steiners - More than Chocolate stamp set

I'll be watching for your cards in the gallery.  I'm excited to see what you can upcycle!  


Stay healthy my friends!  
_________________________________________________________________________

Thank you for visiting my little crevice of the crafty blogosphere.  Your time, comments and friendship are much appreciated.  

Happy Crafting!

Jules


Friday, April 17, 2020

Online Card Classes - Days 2-4


Hello friends.  I have creating cards like a madwoman lately but have slacked off on the sharing portion of the fun.  I've been having a lot of fun with the current Online Card Class Spring Card Camp this week and with daily inspiration videos it's hard to find time to do it all.  Today I'm going to share the cards I created on Days 2, 3 and 4.

I won't be going into any details regarding the techniques.  If you're playing along, you'll recognize them.  If you're not, you can probably figure it out.  Or better yet, come play!  It's an awesome mojo booster.


My cards for Day 2 were inspired by Kristina Werner's technique.


Day 3 was hosted by Yana Smakula.  Here's the card I created using her technique.


Day 4's hostess was Julie Ebersole.  I have to admit that this has been my favorite 
so far, primarily because I'm a fan of CAS cards and Julie's style is just the best.


And here's my second card using the die cut image leftover from my first card.


In the interest of time I'm not going to include my supply list today.  If there's a product here that you'd like me to identify let me know in the comments and I'll get back to you.  Thanks!

Stay healthy my friends!  
_________________________________________________________________________

Thank you for visiting my little crevice of the crafty blogosphere.  Your time, comments and friendship are much appreciated.  

Happy Crafting!

Jules


Wednesday, April 15, 2020

Online Card Class - Day 1 Creations


Hello everyone.  I do hope all of you are safe and sane as we wait out this crazy pandemic.

If you're like me, when you're busy your head is full of crafty ideas and you can't wait for some free time to play.  And then in times like these, when we're all (literally) stuck at home, you may have all of the free time in the world to create but whoosh....your mojo has left the building.  Am I right???

For that reason I was very excited when Jennifer and Kristina (No need for last names.  They're like Cher and Madonna) put together their latest course at Online Card Classes dot com.  The course started on Saturday the 11th but you can jump in at any time.

I will most likely be consolidating a lot of my cards into group posts for the sake of convenience but for today I'm sharing only Day One.  Jennifer's idea on the first day was to use a stamp as an embossing folder, a technique she shares in class.  Without going into great detail here are my two cards.  The first step of the technique was to heat emboss an image which you would use to stencil another image.


 Card One is created with the heat embossed image itself after I'd used it to stencil Card Two.


Card Two.  If you look closely you can see the impression of the floral sprig in the background of the ivory panel.


It might be easier to see it here.  I actually used a sparkly gelly roll pen to trace out the impression.


Card One - The background was created using Distress Oxide inks and then spritzed it with some shimmer.  I die cut the word Hugs and it's shadow die and added a layer of clear embossing powder over the top of both to give them some shine.  I finished it off with some clay hearts embellishments.

Card Two - I framed out the panel with some gold/kraft cardstock and die cut the sentiment in gold foiled cardstock.  I added the gold foiled pearls as added embellishments.  I thought this one would make a nice wedding card.  

I hope you've managed to hang on to your mojo these past few weeks.  I am so thankful that I have a home based hobby right now.

Supplies:
Altenew - Best Mom floral stamp
MFT - Best Wishes die
Studio Katia - Gold Pearls
Sakura - Gelly Roll pen
Honeybee Stamps - Hugs die and shadow
Distress Oxide inks
Trinity Stamps - clay hearts
Imagine Crafts - Frost Shimmer Spray


Stay healthy my friends!  
_________________________________________________________________________

Thank you for visiting my little crevice of the crafty blogosphere.  Your time, comments and friendship are much appreciated.  

Happy Crafting!

Jules

Tuesday, April 14, 2020

CAS Colours & Sketches #366


Time flies.....NOT.  Regardless of whether we know what day it is (or not) I'm here to tell you that it is Tuesday and time for another challenge over at the CAS Colours and Sketches blog.  Today we have a sketch from our hostess Patricia.


Getting right down to business, here is my card.


I stamped images from several stamp sets to create my bedroom scene and used Copic markers to color it all in.  I added some patterned paper to the top portion of my card base, die cut the image panel, and then added it at a angle per the sketch.  The sentiment was heat embossed in white at the bottom left of the card panel.  

A closer look at the coloring...


I used a white gel pen to create the dots on the comforter as well as the stripes on the pillow case.  I made sure she had lots of books to keep her company.

Supplies:
MFT Stamps - Bed Rest stamp set
MFT Stamps - Our Story stamp set
MFT Stamps - Get Well Wishes stamp set
Penny Black - Antique Frame die
Honeybee Stamps - Home Essentials patterned paper


I hope to see your cards in the gallery this week!


Stay healthy my friends!  
_________________________________________________________________________

Thank you for visiting my little crevice of the crafty blogosphere.  Your time, comments and friendship are much appreciated.  

Happy Crafting!

Jules


Sunday, April 12, 2020

Seize the Birthday #187


Forced CoronaCation is providing ample opportunities to play in my craft room.  Today's card was created with the  Seize the Birthday challenge in mind where the topping this go around is Spring Fling.


The first thing that comes to my mind are flowers but I wanted to try something a little bit different.  This is what resulted...


I used a panel die to cut the the delicate white florals which I placed over top of orange cardstock.  I fashioned an envelope using rectangle and square dies and inserted the stamped greenery inside.  The sentiment was stamped in the same green and I finished off the card with some green and orange jewels.  

Supplies:
Sizzix/Tim Holtz cover die
Altenew - greenery and sentiment stamps


Stay healthy my friends!  
_________________________________________________________________________

Thank you for visiting my little crevice of the crafty blogosphere.  Your time, comments and friendship are much appreciated.  

Happy Crafting!

Jules

Friday, April 10, 2020

CAS(e) This Sketch #367


I'm hopping on tonight for another of what I refer to as "drive by" posts.  Today I played along with the folks at the Case This Sketch challenge blog.  Here's the current sketch:


And here's my take:


I began by adhering a gradient of pink cardstock strips to a piece of black cardstock.  Using my MISTI, I stamped the leaf onto the gradient strips and then again on a piece of white cardstock which I used as my front panel.  I then adhered the horizontal striped portion over the top of the white panel using the stem and the tip of the bottom leaf as my positioners.  I glued this down onto a black card base, stamped the sentiment below the stripes and added some pink jewel dots.


Supplies:
Altenew - pink cardstocks, leaf stamp, sentiment
Kat Scrappiness - pink jewels


Stay healthy my friends!  
_________________________________________________________________________

Thank you for visiting my little crevice of the crafty blogosphere.  Your time, comments and friendship are much appreciated.  

Happy Crafting!

Jules