Tuesday, June 30, 2020

CAS Colours and Sketches #377


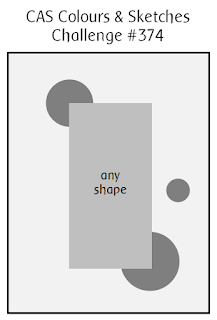
It's time for another challenge over at the CAS Colours and Sketches blog and as luck would have it, we have five Tuesdays in June so today is what we call a Double Challenge.  For this challenge you will need to use our selected color trio along with the chosen sketch. 


For our color challenges, you must use all of the stated challenge colors. You may also use neutral colors;
 however, the challenge colors should be the most noticeable ones featured on your card. We use Stampin' Up 
color names for reference, but you are welcome to use any other companies' products as long as you match 
the challenge colors as closely as possible.  Feel free to rotate or flip the sketch to suit your taste.


Keeping all this in mind here is my Double Challenge Card.


I started off by die cutting the lilies from smooth white cardstock and then colored them with alcohol markers that best matched the challenge trio.  (Some were Copics, some were off brands)  I arranged the florals onto the small white panel, a design element taken directly from the sketch.  I decided to go with a soft grey card stock for both my card base and my diagonal panel.   I inlaid a white zig zag border piece into the diagonal, adhered it to the card base and then finished it off with a narrow white border.  I decided against a sentiment on this one as I felt it would distract from the design.  It also makes it more versatile by allowing me to add an inside sentiment at the time of use.  

I hope to see your card in our gallery this week!!!

Supplies:
MFT - Lily Die-namics
MFT - zig zag border (not sure of exact name)
MFT - grout gray cardstock
assorted alcohol markers


Stay safe and healthy my friends!  
_________________________________________________________________________

Thank you for visiting my little crevice of the crafty blogosphere.  Your time, comments and friendship are much appreciated.  

Happy Crafting!

Jules


Sunday, June 28, 2020

Tic Tac Toe Challenge #070


It's been awhile since I've created a card for a challenge that wasn't an assignment.  I've been eyeing this one for quite some time so today I dove in.  In the Tic Tac Toe Challenge the idea is to use any three items in a row on your card.  


I chose the right column (bicycle, embedded die, sparkle) for my card.  I dug deep in my stash for a bicycle die which I inlaid into the front panel which made the only other requirement very easy.  


I began by stenciling the pavers with some white pigment ink onto a light grey cardstock.  It's really difficult to see in my photo but I coated the dried pavers with a clear sparkle pen, thus filfulling my Tic Tac Toe challenge.  You can see the sparkle better in this closeup photo....


I then die cut the bicycle from the panel saving the little inner bits to replace later.  I stamped the tires in grey ink, heat embossed them with clear powder and then inlaid the wheels into the die cut area.  I inlaid the frame of the bicycle into the panel however the fenders were adhered over top of the wheels.  I finished the inlay by replacing the little bits of the grey card panel that I mentioned before.  The basket and heart balloons were also stamped and heat embossed with clear powder.  (I did a triple embossing on the balloons to give them a bit of glossy shine.)  The sentiment was stamped using the same grey ink and clear embossing powder.  

I'm wishing now that I'd made this a birthday card rather than a wedding card but oh well...next time, right?

Supplies:
PaperTrey Ink - Pedal Pusher stamp and die set
The Greetery - Pathway stencil
Penny Black - Love Balloons die
Distress Oxide Inks - Hickory Smoke and Speckled Egg
Tonic Studios - designer papers 


Stay safe and healthy my friends!  
_________________________________________________________________________

Thank you for visiting my little crevice of the crafty blogosphere.  Your time, comments and friendship are much appreciated.  

Happy Crafting!

Jules


Saturday, June 27, 2020

Sisterhood of the Snarky Stampers #163


We are back with another challenge from our dear friend Edna and the Sisterhood of Snarky Stampers.  Someone get this woman a snorkel please!


You all know that I couldn't possibly create a water card without a shark theme, right?  Coming up with just the right shark species ('cause I do believe I have them all) wasn't hard once I figured out my sentiment.  Here ya go....


The fun in this one will be deciding just what lucky friend will receive it, post pandemic of course. 'Cause as much as I love you, I'm still very much a Social Distancer and I want to party in person.  (Sorry Fin, this one won't be headed to North Carolina.  LOL!  Ooh...unless I send it to his mama.  There's a thought!)

I began my card by Copic coloring in my hammerhead shark and wine glasses.  I created two ink blended backgrounds.  For the sky I did a three color blend of yellows/oranges and then came back over the top with a sun ray stencil.  To create the water I also did a three color blend of blues and then added Jennifer McGuire's baby wipe stencil technique using a snowfall stencil. (For a description of the technique, visit her blog or check out this recent post of mine. ) I then die cut the blended panel with three wave dies.  After that I was just a matter of assembling the card.  The birthday sentiment required some stamp surgery to get the alignment I desired.  The Let's Get Hammered! sentiment was created on my computer and wouldn't ya know it, after I finished this card I discovered that exact sentiment in a different greetings sentiment set of mine.  Oh well, next time.  

Here's a closer look at the details.  I forgot to mention that I added some details with my white gel pen.  I really think it finishing off the overall look.  


Supplies:
Avery Elle - Celebraytion
MFT - Radiating Rays and Snowfall stencils
Simon Says Stamp - Time for Wine and Big Birthday Wishes stamp sets
Impression Obsession - Wavy Edge dies


Come join the fun and show us your cards with a water theme!  We of course love a bit of snark but it's not a requirement in our challenge. 


Stay safe and healthy my friends!  
_________________________________________________________________________

Thank you for visiting my little crevice of the crafty blogosphere.  Your time, comments and friendship are much appreciated.  

Happy Crafting!

Jules


Tuesday, June 23, 2020

CAS Colours and Sketches #376


Happy Tuesday everyone!  I had a very busy week for some reason so I'm keeping both my card and this post very simple and to the point.  

Here is our new sketch for the CAS Colours and Sketches blog.  Please refer to our challenge rules at the top of the blog if you're new to our challenges.


And here is my card.


There's not much to it.  I used a sentiment strip die to create my strips using scraps from my bin.  The hardest part of this card was getting the weaving and spacing correct.  The Happy Birthday is stamped in a crisp black pigment ink.  Voila!  I have another masculine card for future use.  


Supplies:
Ellen Hutson - That Thing You Did stamp set
Simon Says Stamp - Sentiment Labels wafer dies

Stay safe and healthy my friends!  
_________________________________________________________________________

Thank you for visiting my little crevice of the crafty blogosphere.  Your time, comments and friendship are much appreciated.  

Happy Crafting!

Jules


Saturday, June 20, 2020

For My Daddy


When it comes to Father's Day card for my father, I like to keep them simple.  I've chosen hobbies and interests in past cards but this year I kept it generic and to the point.


I did a Distress Oxide ink blending technique on the background.  I will confess that after I assembled this card I realized that I'd placed my sentiment upside down as the gradient was meant to go from light down to dark but I know my dad won't notice that in the slightest.  I die cut the Dad from several pieces of black card stock to layer the ink blended sentiment and added the heat embossed sub sentiment underneath.  I finished it off with a trio of matte dots.  Like I said, simple.

My elderly parents live three hours away but due to Covid, I have not seen them since late December.  Because I live with a front line health care worker I'm not sure when any of us will be comfortable enough to gather again.  They've been hunkered down since February (they saw the signs early) and with grocery deliveries from the wonderful personal shoppers out there, they haven't had to leave their home. We also have a family group text check in most every evening so it's good.  I know they're safe.  But I miss them both terribly.  :-(


Supplies:
Hero Arts - stencil
Distress Oxide inks
Lil Inkers Designs - Dad die
Clearly Besotted - sentiment


Stay safe and healthy my friends!  
_________________________________________________________________________

Thank you for visiting my little crevice of the crafty blogosphere.  Your time, comments and friendship are much appreciated.  

Happy Crafting!

Jules


Thursday, June 18, 2020

Cowantine Birthday Card


Being socially distant and somewhat isolated during these crazy times isn't much fun but for a fun loving girl celebrating her last birthday of "teen-hood" it's really kind of a bummer.  Yep, my youngest turned 19 today and I have to say, I do love her spirit. 

She began planning her party last month prior to the start of her summer term.  Mind you, it's just the three of us here plus her boyfriend but that wasn't going to stop her.  She decided on a Cowantine party and ordered a bunch of cow related birthday decor which I set up this morning.


This is our kitchen table at present.  We plan to order out for Italian tonight and I have a homemade peach cobbler in the oven for dessert.  She has taken this whole pandemic thing so much better than I would have at her age, no doubt about it.  I'm very proud of her.

Ok...now to her card.  I'm sure you know what's coming.  Yes, I purchased a cow stamp set for this occasion and this may be the one and only time I use it.  


I decided to try something different and made it a split front card.  Here's the inside....


I created the split front by die cutting the front panel of my Neenah Solar White 110 lb card base with a landscape die.  I then covered the front of the card with two die cut panels of turf.  I needed two cows and used the mirror stamping technique to create the inside bovine.  I ink blended some clouds on the inside panel, stopping just below the turf line on the front.  I popped up two die cut clouds and then added the sentiment to the lower portion where it would only be visible once open.  

She was very happy with her Cowantine card and it's already displayed in her room.  And if I may brag, she received a letter this past week from her college congratulating her on making The Dean's List.  If you knew our homework struggles when she was younger, you'd know just how big of an accomplishment this is for us both.  *wink*  


Supplies:
Technique Tuesday - Clementine the Cow stamp set
MFT - Tucked in Turf die, mini cloud stencil
Taylored Expressions - cloud dies
Copic markers


I'm definitely open to suggestions on how else to incorporate this stamp set into my life.  If you have any ideas, please, please, please post them below!

Stay safe and healthy my friends!  
_________________________________________________________________________

Thank you for visiting my little crevice of the crafty blogosphere.  Your time, comments and friendship are much appreciated.  

Happy Crafting!

Jules

Tuesday, June 16, 2020

CAS Colours and Sketches #375


It's time for another challenge over at the CAS Colours and Sketches blog.  Today we challenge you to use the trio of colors illustrated below, chosen by DT member Shannon.


For our color challenges, you must use only the stated challenge colors. You may also use neutral colors; however, the challenge colors should be the most noticeable ones featured on your card. We use Stampin' Up color names for reference, but you are welcome to use any other companies' products as long as you match the challenge colors as closely as possible.


I decided to create a card using only die cut elements and due to the nature of my focal die, I was able to get a trio of cards using the negative elements.  


I began by die cutting four pieces of card stock in the three challenge colors as well as white.  I was careful to keep all of the diamond bits in a bowl so as not to get lost.  I backed each of the positive rectangle images with sticky backed paper and then proceeded to re-insert the diamonds in a semi-random pattern.  I matted each of the rectangles in an opposing color and then adhered them to white card panels that I'd dry embossed with three different folders.  (It's really hard to see in the first card but there are vertical stripes on the white panel.)  I finished each of them off with a die cut sentiment and then adhered the completed panels to an A2 card base.  

I'm really pleased with the end results especially given that these color trio is perfect for masculine cards.  

Supplies:
Ellen Hutson - diamond die
Simon Says Stamp - thanks die and shadow
WRM - vertical and diagonal embossing folders
PaperTrey Ink - linen cover plate


I do hope you'll play with us this week!!!  I'll be watching for you in the gallery.  


Stay safe and healthy my friends!  
_________________________________________________________________________

Thank you for visiting my little crevice of the crafty blogosphere.  Your time, comments and friendship are much appreciated.  

Happy Crafting!

Jules


Sunday, June 14, 2020

Less Is More Challenge #421


Popping in for another "drive by" post where I'm sharing a card I created for the Less is More challenge blog this week.  I was drawn to the  prompt of Borders.


I've recently revamped some of my stamp storage and realized that I have tons of stamps from PaperTrey Ink that I rarely use anymore.  Today was time to remedy that. 


I stamped out the border in a crisp black pigment ink.  I heat embossed the sentiment and large heart in a platinum embossing powder, fussy cutting the heart once cool.  I then did a pad to paper technique with my embossing ink to create a swatch of platinum paper from which I die cut the smaller hearts.  I layered the panel on top of a piece of embossed card stock and adhered the entire thing to my card base for a very simple and yet elegant look.  


Supplies:
PaperTrey Ink - stamp set (so old it's unlabeled)
Martha Stewart - heart punch
Ranger - Liquid Platinum embossing powder
Tonic Studios - Champagne Harlequin Embossed Cardstock 


Stay safe and healthy my friends!  
_________________________________________________________________________

Thank you for visiting my little crevice of the crafty blogosphere.  Your time, comments and friendship are much appreciated.  

Happy Crafting!

Jules


Saturday, June 13, 2020

Sisterhood of Snarky Stampers #162


It's time for another challenge over at the Sisterhood of Snarky Stampers blog where the prompt is -
T is for Technique. 


Image may contain: 1 person, text


I recently watched a YouTube video from Yana Smakula where she demonstrated something new from Tonic Studios called Crackle Mousse.  This product can be used with stencils and when dry, it creates a beautiful crackle effect.  I ordered some immediately (cause that's how I roll these days!) in the color Russian White which was my favorite of the bunch.  I thought I'd share this simple technique today.


I chose a martini glass stencil as my background, taping it down to a piece of Neenah Solar White cardstock in 110 lb weight.  I spread a generous amount of the mousse across the stencil and after smoothing it out I removed the stencil and allowed the to panel dry while I worked on the rest of the card.  

My next step was to create a stencil from the large martini die set.  I used some Distress Ink to tint my Russian White paste to this pretty blue color.  I once again spread the paste out over the stencil, allowed it to dry and then die cut out my image.  I adhered the glass to the panel and popped up the inner beverage portion.  

The sentiment was heat embossed with a coordinating color and popped up over the martini glass.  It's hard to see but the color matches quite well with the Russian White in the background.  


I really, really love this product!  It's easy to work with and the results are stunning.  I highly recommend adding it to your next crafty order.  As you can see, Russian White is really the only color you need as you can easily tint it with any ink color in your stash.  


Supplies:
Picket Fence - Martini Glass stencil
MFT - Martini Glass Shaker die set
MFT - Sassy Birthday 2 stamp set
Tonic - Crackle Mousse in Russian White
Distress Ink - Speckled Egg 
Ranger - Embossing Powder in Liquid Platinum


We've had some easy prompts the past few weeks.  Share your favorite technique with us.  Snarky is good but not required!


Stay safe and healthy my friends!  
_________________________________________________________________________

Thank you for visiting my little crevice of the crafty blogosphere.  Your time, comments and friendship are much appreciated.  

Happy Crafting!

Jules

Thursday, June 11, 2020

Miscellaneous Cards


As you know, I tend to create cards based on challenges but the other day I decided to wing it.  (I do know how to live on the edge.  LOL!)

I took advantage of several awesome sales this spring and wanted to just play for the fun of it.  I created a trio of cards from an older but  "new to me" stamp set .  Here's are the end results....


Supplies:
Avery Elle - MOD stamp set
Ranger - Distress Oxide inks
Misc - enamel dots


I really love the fun modern design of this stamp set and hope to make more using a more neutral and masculine color combination.  I'll be sure to share once I do.


Stay safe and healthy my friends!  
_________________________________________________________________________

Thank you for visiting my little crevice of the crafty blogosphere.  Your time, comments and friendship are much appreciated.  

Happy Crafting!

Jules


Tuesday, June 9, 2020

CAS Colours and Sketches #374


It's time for a new sketch challenge over at the CAS Colours and Sketches blog.  Today's sketch was created by Wei and I love it's versatility!


I decided to flip the sketch to create a horizontal A2 card but did keep the center element rectangular.  Here's what eventually transpired.


Thanks to some awesome patterned paper this design appears far more time intensive than it actually was.  I cut the rainbow strip of paper long enough to accommodate my sentiment, stamping it out in two colors.  I die cut the circles from scrap card stock and added a few clear droplets as embellishments.

Supplies:
The Ton - Fill It In stamp set
The Stamp Market - designer paper and card stock
MFT - Stitched Circle Stax dies

I hope you'll come and play with us this week!  


Stay safe and healthy my friends!  
_________________________________________________________________________

Thank you for visiting my little crevice of the crafty blogosphere.  Your time, comments and friendship are much appreciated.  

Happy Crafting!

Jules

Tuesday, June 2, 2020

CAS Colours and Sketches #373


It's the first Tuesday in June (WHAT???) and we have a new color combo for you over at the CAS Colours and Sketches challenge blog.  The colors were chosen by Samantha and I think I'm in love.  


I used one large floral stamp and a three colored pencils to create my focal image.


As you can see, I used a very light touch with my pencils.  I had one blue, one green and one white in a mix of Prismacolor and Polychromos.  Here's a closer look-see.  


I stamped the outline and sentiment in black pigment ink, colored in the image, added the panel to a card front made with Neenah Desert Storm 110 lb card stock and then finished it off with a  few clear droplets as accents. 


While I had the stamp out I decided to try a similar card front on kraft card stock.  The blue pencil wasn't showing up anywhere near the Pool Party color so I scrapped the color challenge theme and went with some darker accents in a different shade of blue pencil.   We'll just call it this one a Bonus Card.  :-)


Supplies:
Altenew Delicate Bouquet floral stamp
Altenew Super Script sentiment stamp set
Assorted colored pencils
Neenah cardstock in 110 lb Solar White and 110 lb Desert Storm
HoneyBee Stamps - clear droplets

I'm curious.  Colors aside, which card do you prefer?  The white panel or the kraft panel?  I honestly can't choose.  I love them both.  (Am I allowed to say that?  *blush*)

I hope to see your card in our gallery this week!

Stay safe and healthy my friends!  
_________________________________________________________________________

Thank you for visiting my little crevice of the crafty blogosphere.  Your time, comments and friendship are much appreciated.  

Happy Crafting!

Jules