Sunday, December 13, 2020

Freshly Made Sketch Challenge #465


My Christmas cards are postal and my DT assignments are done for the year so it's time to play!  The first challenge up is from the team over at Freshly Made Sketches.   When I saw this week's sketch I knew I had to play along.  


I grabbed one of my favorite 25 Days of Christmas tags and turned it into a card.  


I stamped a panel of white cardstock with a crisp black pigment ink and then cut it down for a nice wide border on my black card base.  I adhered the tag and added a few red pearls.  I'm not sure it totally fits with their rules since I've shared the tag previously but I'll let them decide.  I love it and think I'll turn a few more of my 2020 tags into cards.  


Supplies:
Lil Inkers - Santa die
Ellen Hutson - Tis the Season stamp set
PaperTrey Ink - holly die
MFT - All Lined Up Diagonally background stamp


Stay safe and healthy my friends!  
_________________________________________________________________________

Thank you for visiting my little crevice of the crafty blogosphere.  Your time, comments and friendship are much appreciated.  

Happy Crafting!

Jules 

Saturday, December 12, 2020

Sisterhood of Snarky Stampers #175


The holidays this year will certainly be different for most of us.  With my son and his family now in North Carolina it's sure to be very quiet around our house.  *insert sad grandma face here*  But Edna's here to add a bit of holiday sass to our final challenge of the year.  The theme this fortnight over at the Sisterhood of Snarky Stampers is Lewd Christmas. 


The official definition of lewd refers to something sexually crude or offensive.  I toned that down a bit in order to leave a little something to the imagination.  *wink*


My focal point is a really old Julie Nutting stamp from Prima, circa 2013.  These stamps are really long (perfect for a slimline card) however I didn't need the entire image.  I stamped her out onto white cardstock and colored her with alcohol markers.  I added the stripes to her legs to mimic a cute set of Christmas stockings.  I fussy cut a mask so that I could add a bit of subtle ink blending around the image.  I stamped the sentiment, added in the black clay hearts and then finished off her attire with some Glossy Accents on her sash/shoes and white glitter Stickles to her ruffle.  I'm sure Santa would be very happy to have her sit on his lap this year.  :-)

Check out the blog to see what my fellow Sistahs have created.  There's sure to be something there to give you a chuckle.  I hope you come play along but if not, we'll see you on the blog next year.  


Supplies:
Prima Julie Nutting - girl stamp
Hero Arts - Snarky Christmas stamp set
HAI - black clay hearts


Stay safe and healthy my friends!  
_________________________________________________________________________

Thank you for visiting my little crevice of the crafty blogosphere.  Your time, comments and friendship are much appreciated.  

Happy Crafting!

Jules 


Thursday, December 10, 2020

My Blue Phase ...


I mentioned an earlier post that I created some extra backgrounds while making Tuesday's card.  Blue has never been a particular favorite of mine but there's just something about this blended color combination that has me smitten right now.


This first card was created for my nephew's 23rd birthday.  It's really hard to design masculine cards, especially for this age group.  Like his aunt, he does love a good cocktail so that's the direction I took with his card.  I included a bit of (hidden) snark for good measure.  


To create this one I die cut the cocktails twice, once with white cardstock and again in a silver metallic cardstock.  I cut down the silver die cuts so that they appear as the liquid refreshment inside the glass.  The sentiment was done with Versamark ink and white embossing powder.  I just love the way it pops off the blue background.


The blue/kraft combination of Tuesday's challenge card which is what inspired my second creation.  


I added some silver spray splatters to the blue which add a very subtle shine to the background.  I adhered the kraft garland sprig to the top center and a die cut sentiment down below. The addition of some iridescent bubbles added a bit of interest to this otherwise rustic card.    

I really love both of these cards and think I've got the blue out of my system for awhile.  :-)  Thanks for humoring me.  


Supplies:
Distress Oxide blended backgrounds

Paper Smooches - Drink Glasses die set
MFT - Spirited Sentiments stamp set
Satin Silver cardstock

Penny Black - Winter Garland die
Clearly Besotted - Merry Christmas die
Studio Katia - Iridescent Bubbles


Stay safe and healthy my friends!  
_________________________________________________________________________

Thank you for visiting my little crevice of the crafty blogosphere.  Your time, comments and friendship are much appreciated.  

Happy Crafting!

Jules 


Tuesday, December 8, 2020

CAS Colours and Sketches #400


Happy Tuesday everyone!  It's time for our last CAS Colours and Sketches challenge of 2020.  I've had a wonderful time on the blog this year however I am not in the least bit sorry to see this year come to an end, that's for sure.  

In addition to a fun holiday challenge twist we have two announcements.  Wanna hint?  Let's just say it involves a fabulous prize and new Design Team members.  Check out the blog for details!

Challenge #400 is to take any sketch, color trio or double challenge from 2020 and create a seasonal card.  (You may also combine any sketch and color trio for your own personal double challenge.)  I very immodestly chose one of my color trios because I loved it so much.  *blush*


My Choice ---


I also rather immodestly piggybacked off of a card that Wei created that week.  I loved it so much and wanted to create something similar.  


I used Distress Oxides and a rectangle stencil to blend out my background.  I cut it down using a stitched border die, leaving plenty of white margin and enough room for my navy card base to show.  I added the deer and some white cardstock snowflakes.  All it needed was a simple sentiment. 

I whipped up several of these lovely blue backgrounds and created two additional cards that I will share later this week. 

Supplies:
MFT Delightful Deer die
MFT - Santa Elves stamp set (sentiment)
PoppyStamps - Snowflake Oval Collage die
Taylored Expression - Rectangle 6x6 mask
Distress Oxides


Be sure to stop by the blog to say hello to our new teammates as well as see how you can enter to win a fabulous prize from Uniko.  


Stay safe and healthy my friends!  
_________________________________________________________________________

Thank you for visiting my little crevice of the crafty blogosphere.  Your time, comments and friendship are much appreciated.  

Happy Crafting!

Jules 


Friday, December 4, 2020

Hanukkah Cards

Be forewarned...long winded and occasionally whiny post ahead.  

I was recently commissioned by a girlfriend to create Hanukkah cards for her teenage niece and nephew.  I instantly agreed and then realized that I have absolutely nothing for the Jewish faith in my enormous stash.  So I'm thinking... "No worries...I'll pick something up in the Silhouette Studio."  Yeah, that didn't work.  I have two computers and after downloading all of the software, my library and designing the cut files, neither computer would recognize my machine.   &*$^%#@.   And their website doesn't have updated drivers for my older model so I may be totally SOL but I'm pushing that aside to another day. 

In the meantime I put on my big girl panties and moved on to my next brilliant idea.  Google for digital images!  Well that proved to be another waste of time so I really had to think outside the box.

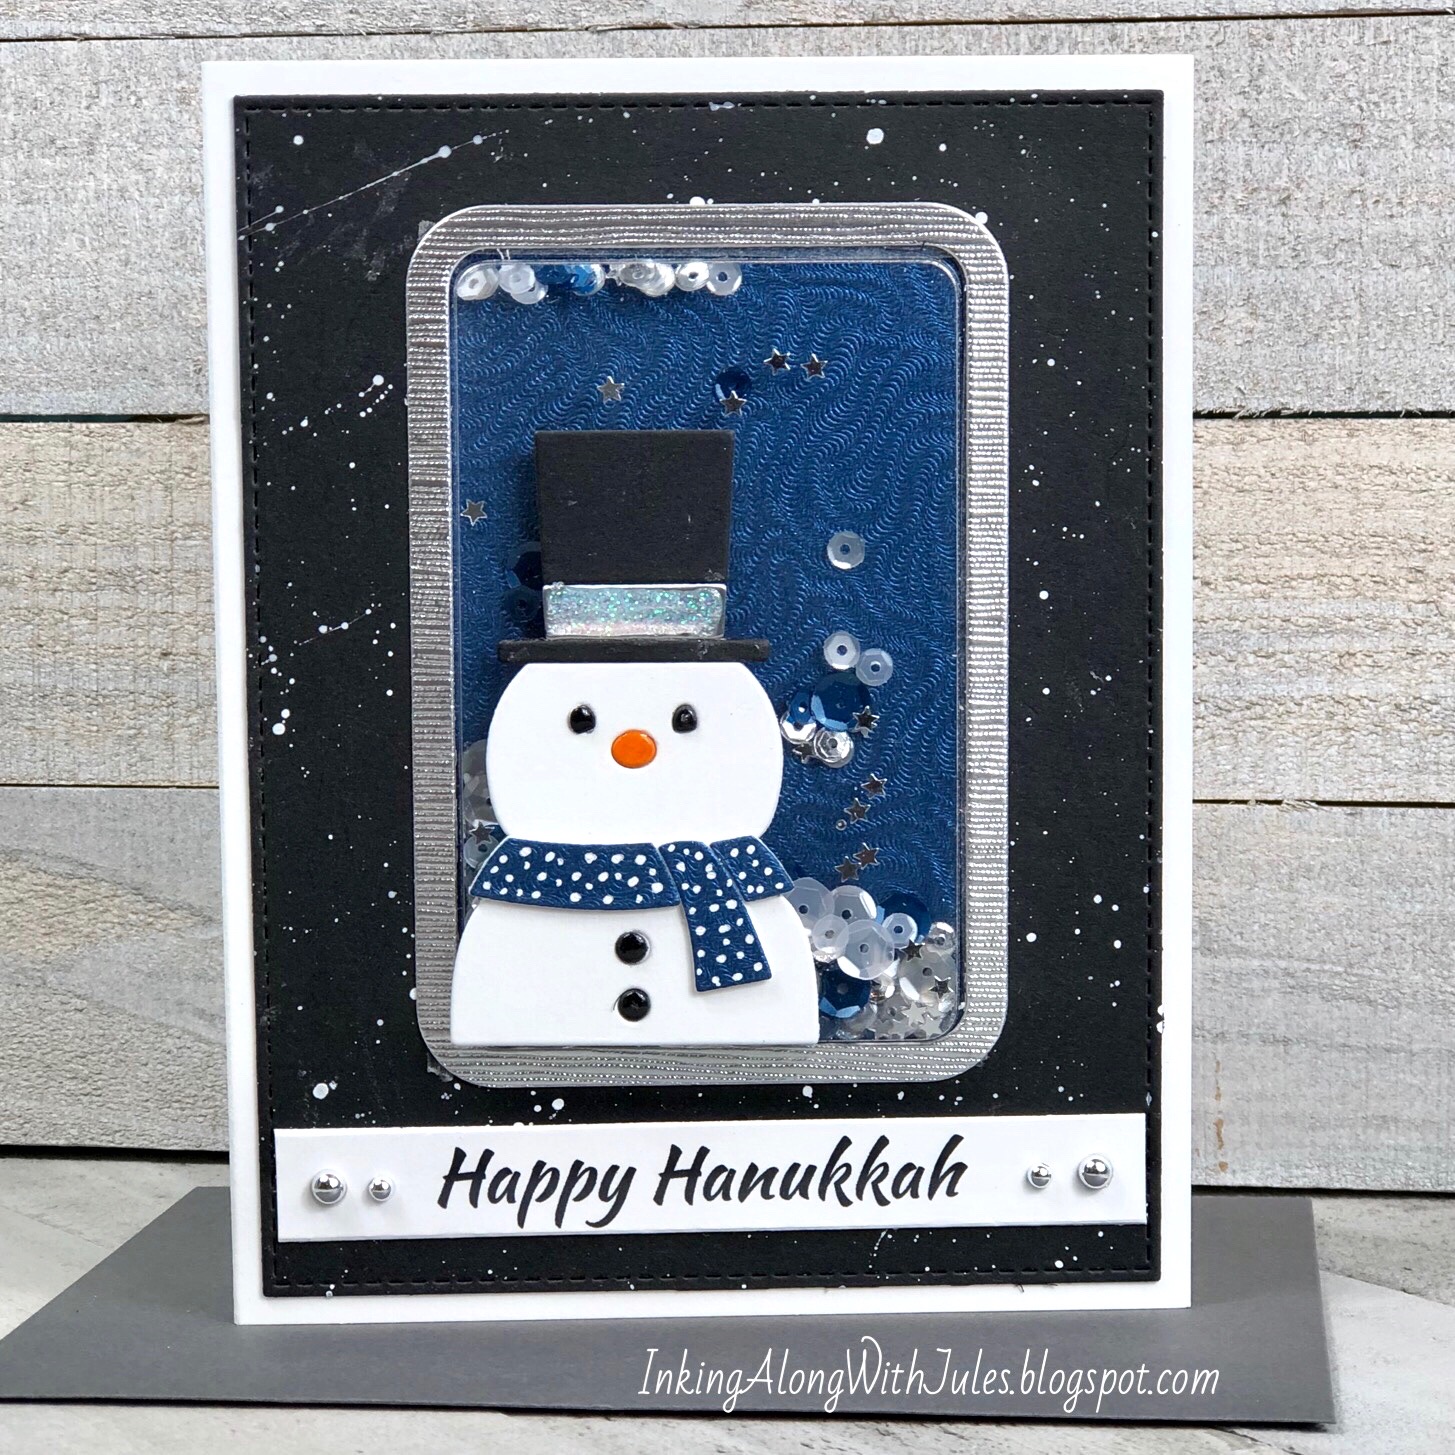
Because they live up north (we're in FL) I knew I could use a snowman so I decided to design it in Hanukkah colors and bling it up a bit for a teen girl.  After a bit of evolution (and spillage of a bottle of white acrylic paint onto my desk  AND  my black Lululemon leggings   ***huge gasp and a few more choice cuss words***   this is what I came up with in the end.


I had to go with a computer generated sentiment but I think it turned out darling.  The actually making of this card took very little time but combined with the outdated technology and a comedy of errors, it was basically a day long project. *sigh*  


On to my next card --

In my opinion a cool truck is always an option so I designed her nephew's card around one of my all time favorite dies.


I created this one in Hanukkah colors as well and loaded up the back end with gifts.  I gave the background a bit of oomph with some ink blending along the edges and printed the sentiment on some vellum which I added to the tailgate.  It was really, really difficult not to add in some pretty embellishments so I basically had to hide this card from myself.


And because I'm a glutton for punishment I made her a bonus card.  This one has a more traditional elegant look and feel to it.


I used an embossing folder and silver cardstock to create the background texture.  The eight gifts (kinda proud of myself for that one.  LOL!) were created with a die.  The beautiful paper used in all three of my cards is from a Tonic Studio 6x6 paper pack.  I die cut the Happy, added to to another computer generated sentiment strip and used some glitter drops as accents.  

In the end I was extremely pleased with all three cards and hope she loves them as well.  I am definitely planning to buy a Hanukkah stamp set before next year.  I have my eye on this one from HoneyBee Stamps but would appreciate any recommendations you might have. Oh and in case you're wondering...saving my Lulus took precedence over my project and craft desk and I'm relieved to say that I was able to the get paint out.  :-)   

Supplies:
Simon Says Stamp - Snowman Picture Book die
Simon Says Stamp - Brilliant Gifts die
MFT Stamps - Gift Card Shaker Set die
Spellbinders - Truck die
Fun Stampers Journey - Cozy Knit embossing folder
Tonic Studios - December Skies 6x6 paper pack
Pretty Pink Posh - Starry Night Sequin Mix
MFT Stamps - Happy Birthday Block die


Stay safe and healthy my friends!  
_________________________________________________________________________

Thank you for visiting my little crevice of the crafty blogosphere.  Your time, comments and friendship are much appreciated.  

Happy Crafting!

Jules 


Thursday, December 3, 2020

25 Days of Christmas Tags - Final Post (5 of 5)

I've finally reached the end of my Christmas tag.  Be sure to scroll back through my feed if you missed Posts 1-4.  Today I'm sharing the tags I created for Days 21- 26 of the challenge.  (Yes, the challenge is called 25 days of tags however she has been doing a bonus 26th day for several years now.)  


To simply my life, you can find the details on Tracey's blog.  In a nutshell though, each day showcases a different manufacturer.  We, the participants, create a tag or tags inspired by her one of her Design Team examples.  

For more details on the folks who inspired me as well as the products I've chosen and, please check me out on IG @juliepeddicord


Day 21


Day 22


Day 23


Day 24


Day 25


Day 26


As always, I had a lot of fun creating these.  It was a bit less "stressful" this year because I managed to have my personal handmade holiday cards (all 115 of them!) finished on Oct. 31st.  Of course it's already December and I haven't gotten them mailed out but I'm working on it.  I'll be sure to share once they're all postal.


Stay safe and healthy my friends!  
_________________________________________________________________________

Thank you for visiting my little crevice of the crafty blogosphere.  Your time, comments and friendship are much appreciated.  

Happy Crafting!

Jules 


Tuesday, December 1, 2020

CAS Colours and Sketches #399


Wow!  It's December already.  It's odd how during what often seems like the slowest year on record, the months themselves seem to pass quickly.  It's Tuesday once again and we have a new color trio compliments of Patricia over at the CAS Colours and Sketches challenge blog.  


For our color challenges, you must use all of the stated challenge colors. You may also use neutral colors; however, the challenge colors should be the most noticeable ones featured on your card. We use Stampin' Up color names for reference, but you are welcome to use any other companies' products as long as you match the challenge colors as closely as possible.


I took the metallic silver as the incentive I needed to pull out my Spellbinders Glimmer Hot Foil machine.  I've had it for months now (maybe even a year???) but I've only played with it once.  I won't lie.  It took me four tries to get this one right but I do love it.  


Once the foiling was complete this was a very easy card to create. I die cut the panel and adhered it to a mint colored card base leaving just a bit of the mint peeking out along the sides.  I die cut the sentiment out twice, the words in blush and the ampersand in mint.  I stacked them for just the tiniest bit of dimension and adhered the three pieces to the center of the wreath.  As a final touch I added in some mint and clear droplets over top of the silver berries of the foiled wreath.  

Supplies:
Spellbinders - Holly Wreath glimmer plate
Ellen Hutson - Merry & Bright die set
Studio Katia - mint/clear droplets


I hope I've inspired you to pull out, dust off, and used your coveted but underutilized tools.  In the meantime check out our blog and come join in the fun!


Stay safe and healthy my friends!  
_________________________________________________________________________

Thank you for visiting my little crevice of the crafty blogosphere.  Your time, comments and friendship are much appreciated.  

Happy Crafting!

Jules